S1 Popout Board
Active
The S1 Popout board is a straightforward development to help you get started with the S1 Module.

Contents
S1 Module
The built-in S1 Module is designed for IoT projects where performance is key, yet space and power constraints cannot be compromised.
It features a clever combination of four ICs.
- A Bluetooth 5.2 SoC
- An FPGA designed for low power AI/ML
- A complete battery management IC
- And 32Mb of flash memory
Additionally, the module breaks out high speed IO and several adjustable power rails so that your design can remain compact.
To read more about the S1 Module, be sure to check out the full datasheet here.
I2C Sensor Port
The I2C port lets you easily chain together multiple sensors and peripheral devices. The connector is compatible with both Adafruit’s STEAMMA QT sensors, and Sparkfun’s QWIIC modules.
You’re sure to find plenty of plug-and-play devices to get you prototyping fast.

The connector exposes SDA, SCL, GND and a software adjustable voltage rail. Pull up resistors are not included on the board, but you can configure the FPGAs built in pull-ups to take care of this for you.
Connecting Batteries
The S1 Popout Board features a standardized JST battery connector for attaching a 3.7V lithium polymer battery. The integrated battery management of the S1 Module allows the Popout Board to be powered either from USB-C, or a lithium cell. When both are connected, the cell will charge automatically.
WARNING: Lithium batteries are of course dangerous if mishandled. The default state of the battery charger will limit charge current such that even the smallest lithium cells can be safely connected. However the real charge parameters are set in the user’s firmware which will override this setting. Be sure that the firmware configuration for battery charging is correctly configured before attaching a lithium battery to the S1 Popout Board.
Programming
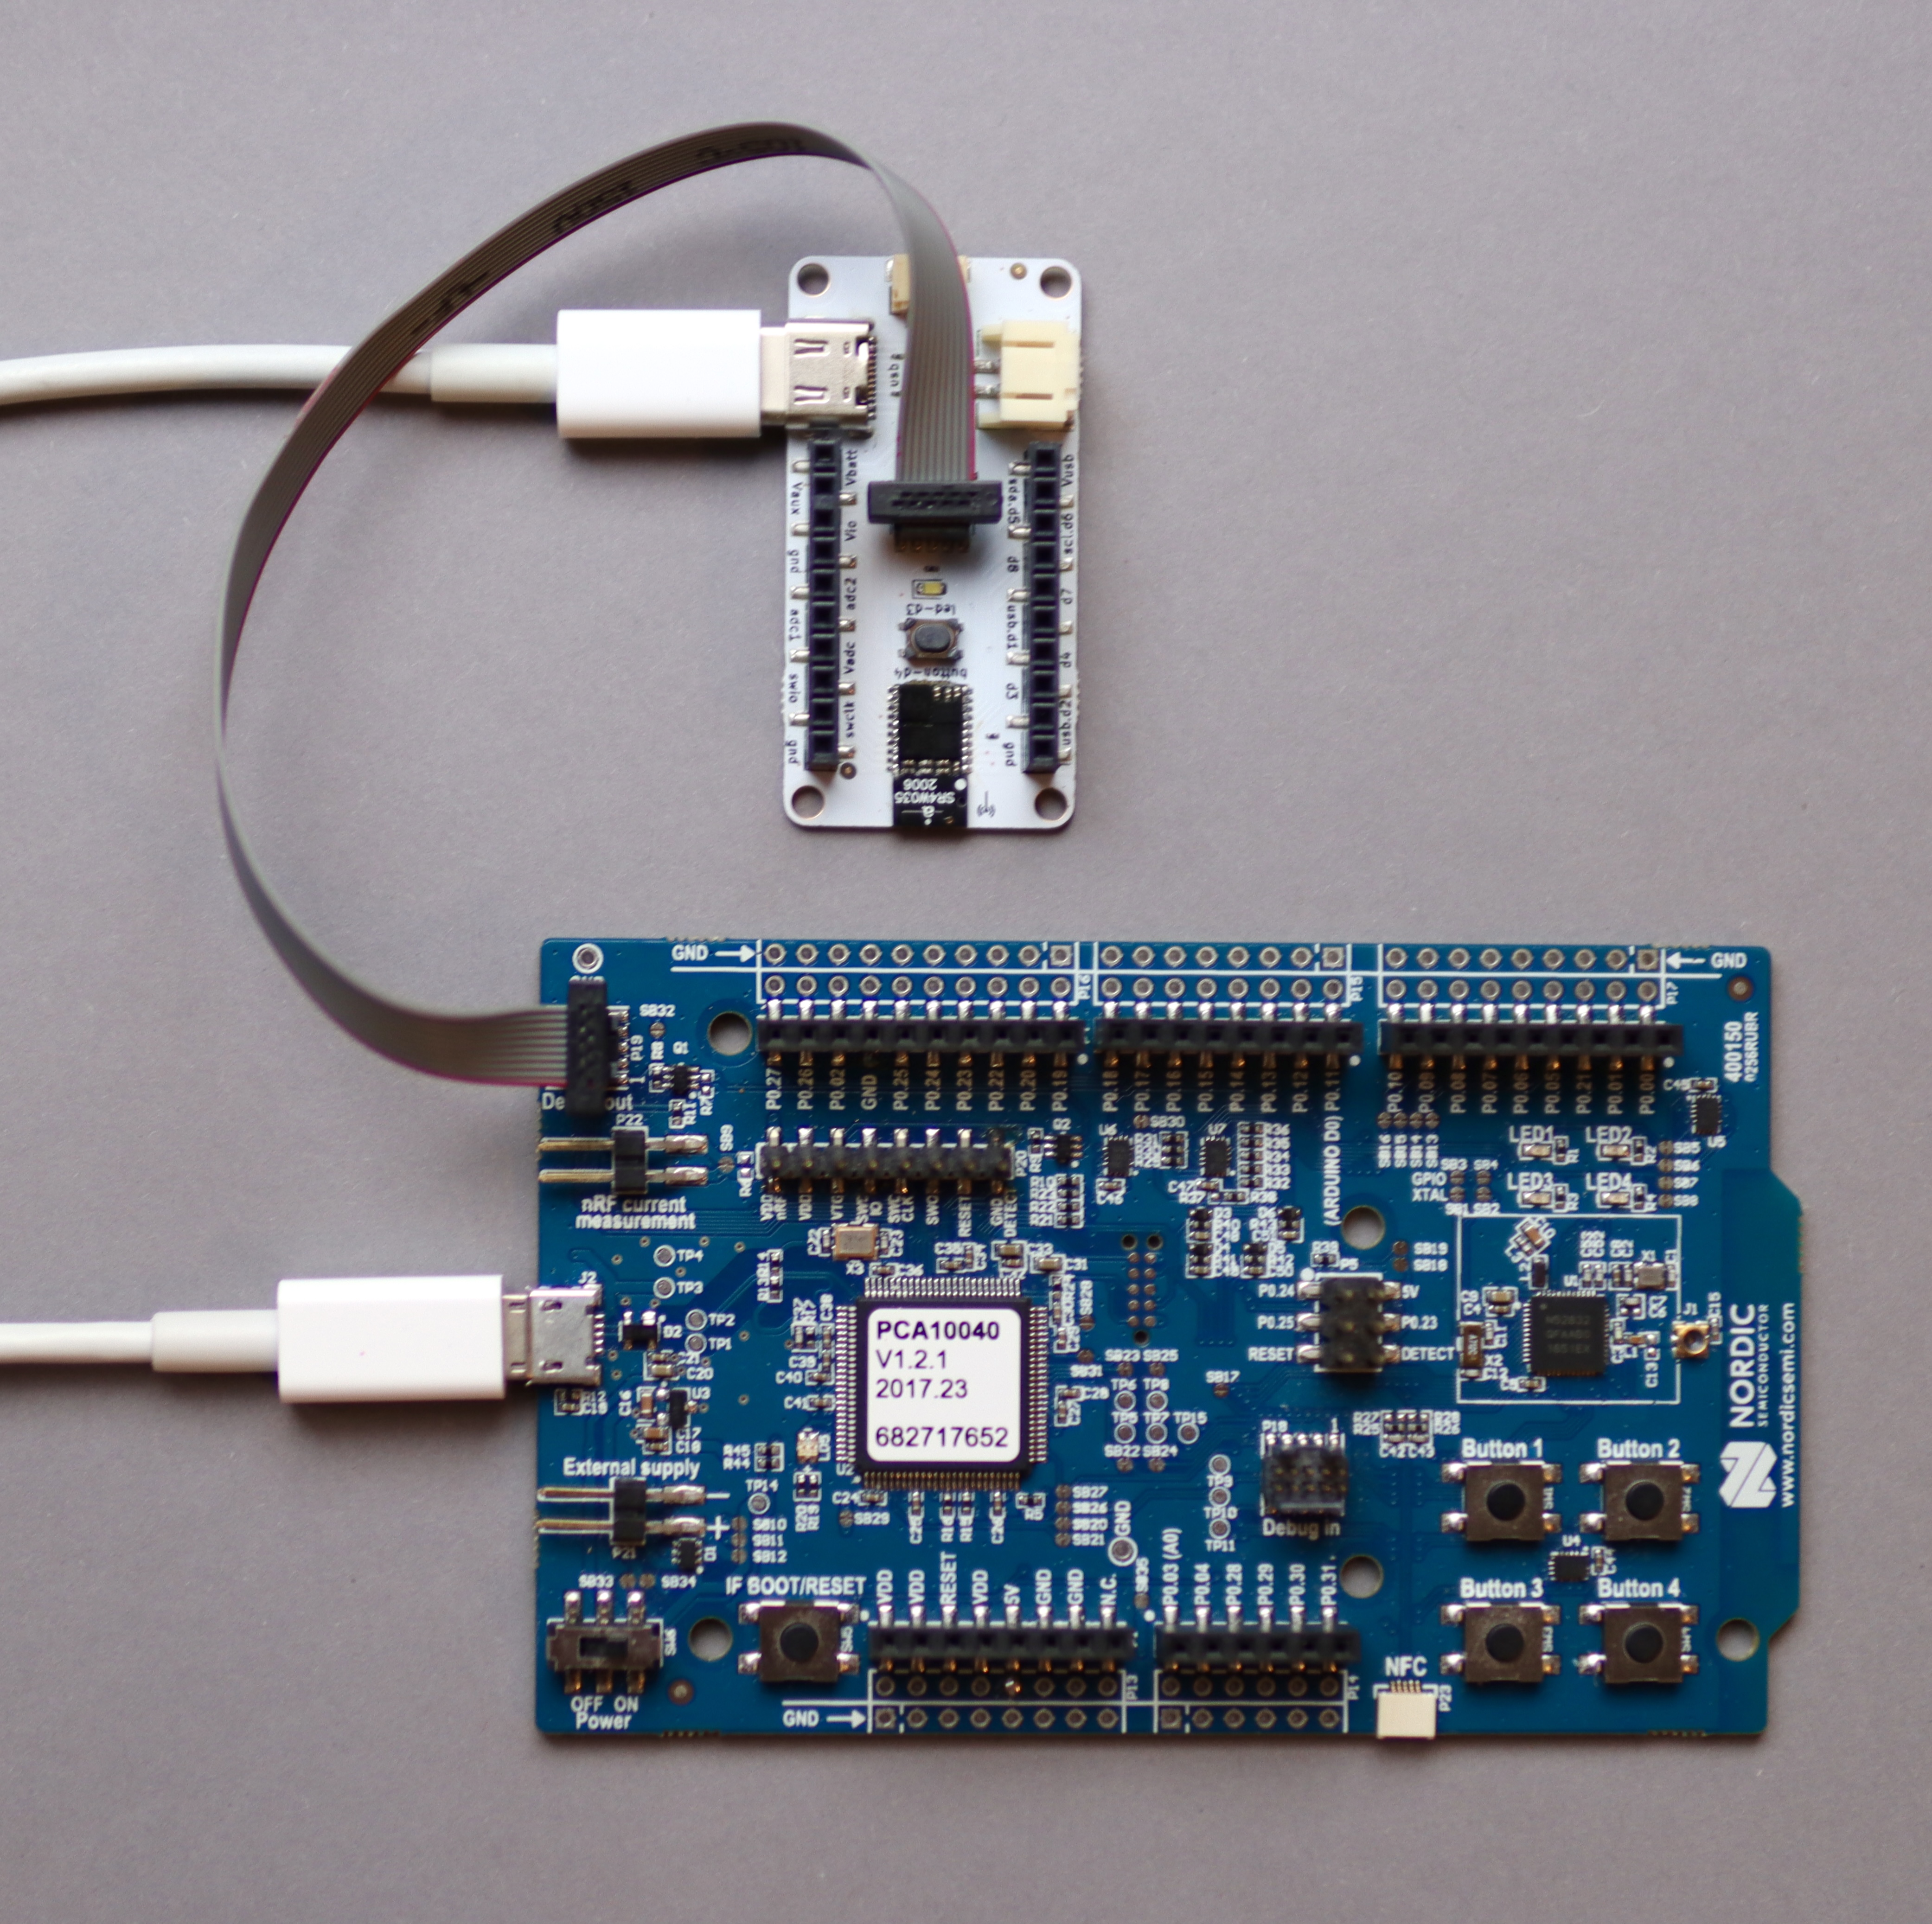
A standard 10 pin Cortex debug port is included on the S1 Popout Board to allow for programming of the S1 Module. We recommend using a J-Link based programmer, though it’s possible to use any ARM Cortex-M compatible programmer.
It is also possible to use an nRF52 development kit from Nordic as shown below.

To get started with developing code for the S1. Check out the S1 Blinky Demo.
IO
All IO pins from the S1 Module are exposed on the two 0.1” pin headers. They are laid out in the same order as the module itself and are labeled for reference.
It should be noted that some of the pins are are also connected to the other connectors.
D1 & D2 are the data lines going to the USB jack. To disconnect these from the USB, the two jumper pads on the back of the board can be cut.
D3 & D4 are connected to the LED and button respectively. The button only pulls the pin low when pressed. Otherwise it is floating. To use the button, the FPGA IO configuration must be set so that the internal pull-up resistor is enabled.
D5 & D6 are the SDA and SCL lines which go to the I2C port. These are floating when no connector is plugged in, and don’t include pull-up resistors on the board. If required, the pull-up resistors can be enabled within the FPGA IO configuration.
Vusb is tied to the 5V rail of the USB jack.
Vbatt connects to the positive terminal of the JST battery jack.
SWCLK & SWDIO are connected to the debug port.
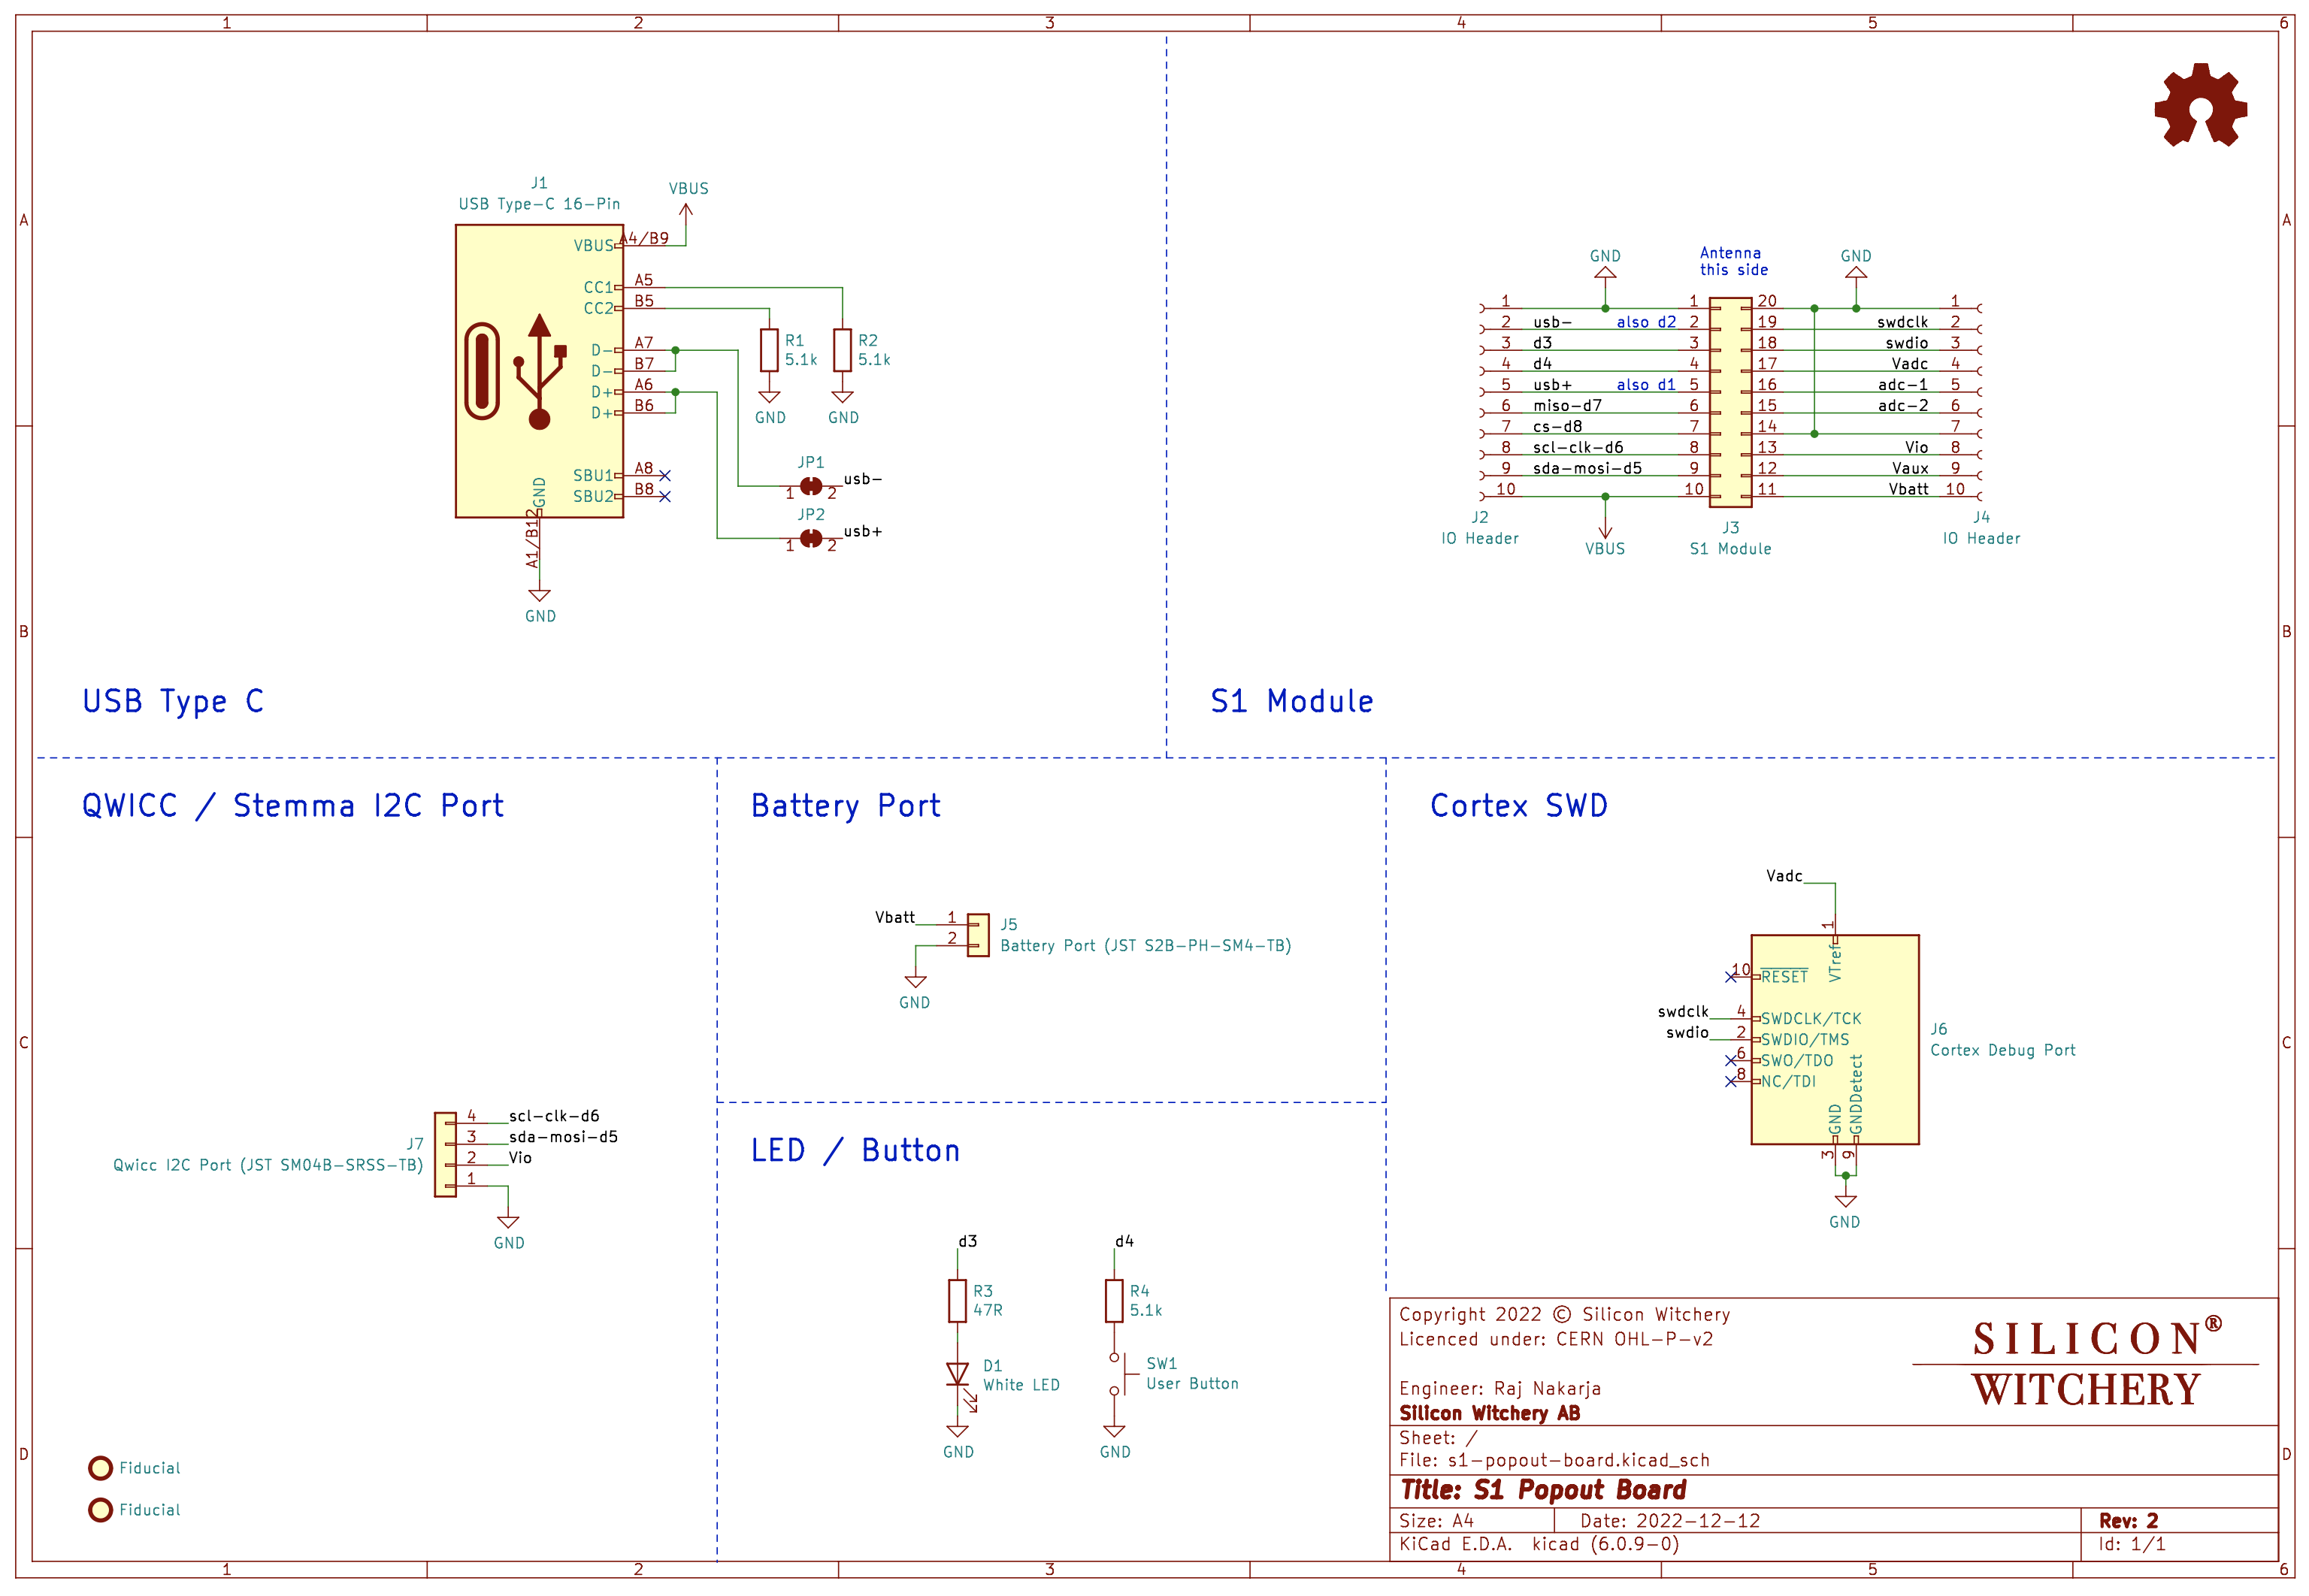
Schematic
The complete schematic for the S1 Popout Board is shown below. A PDF version is available here.

Design Files
All the design files can be found within the S1 Popout Board repository.
Licence
Copyright 2022 © Silicon Witchery.
This design is licenced under: CERN Open Hardware Licence Version 2 - Permissive.