Getting Started with the S2 Module and Superstack
Rohit Nareshkumar, Solutions Architect and Embedded Applications Engineer | July 24, 2025
The S2 Module and Superstack platform streamlines deployment, management, and scaling of IoT sensing systems. It provides a unified environment for onboarding devices, managing code, and analyzing data.
Superstack is designed for both newcomers to IoT and experienced developers. It allows you to quickly get up and running without the hassle of building complex infrastructure, databases, or device firmware.
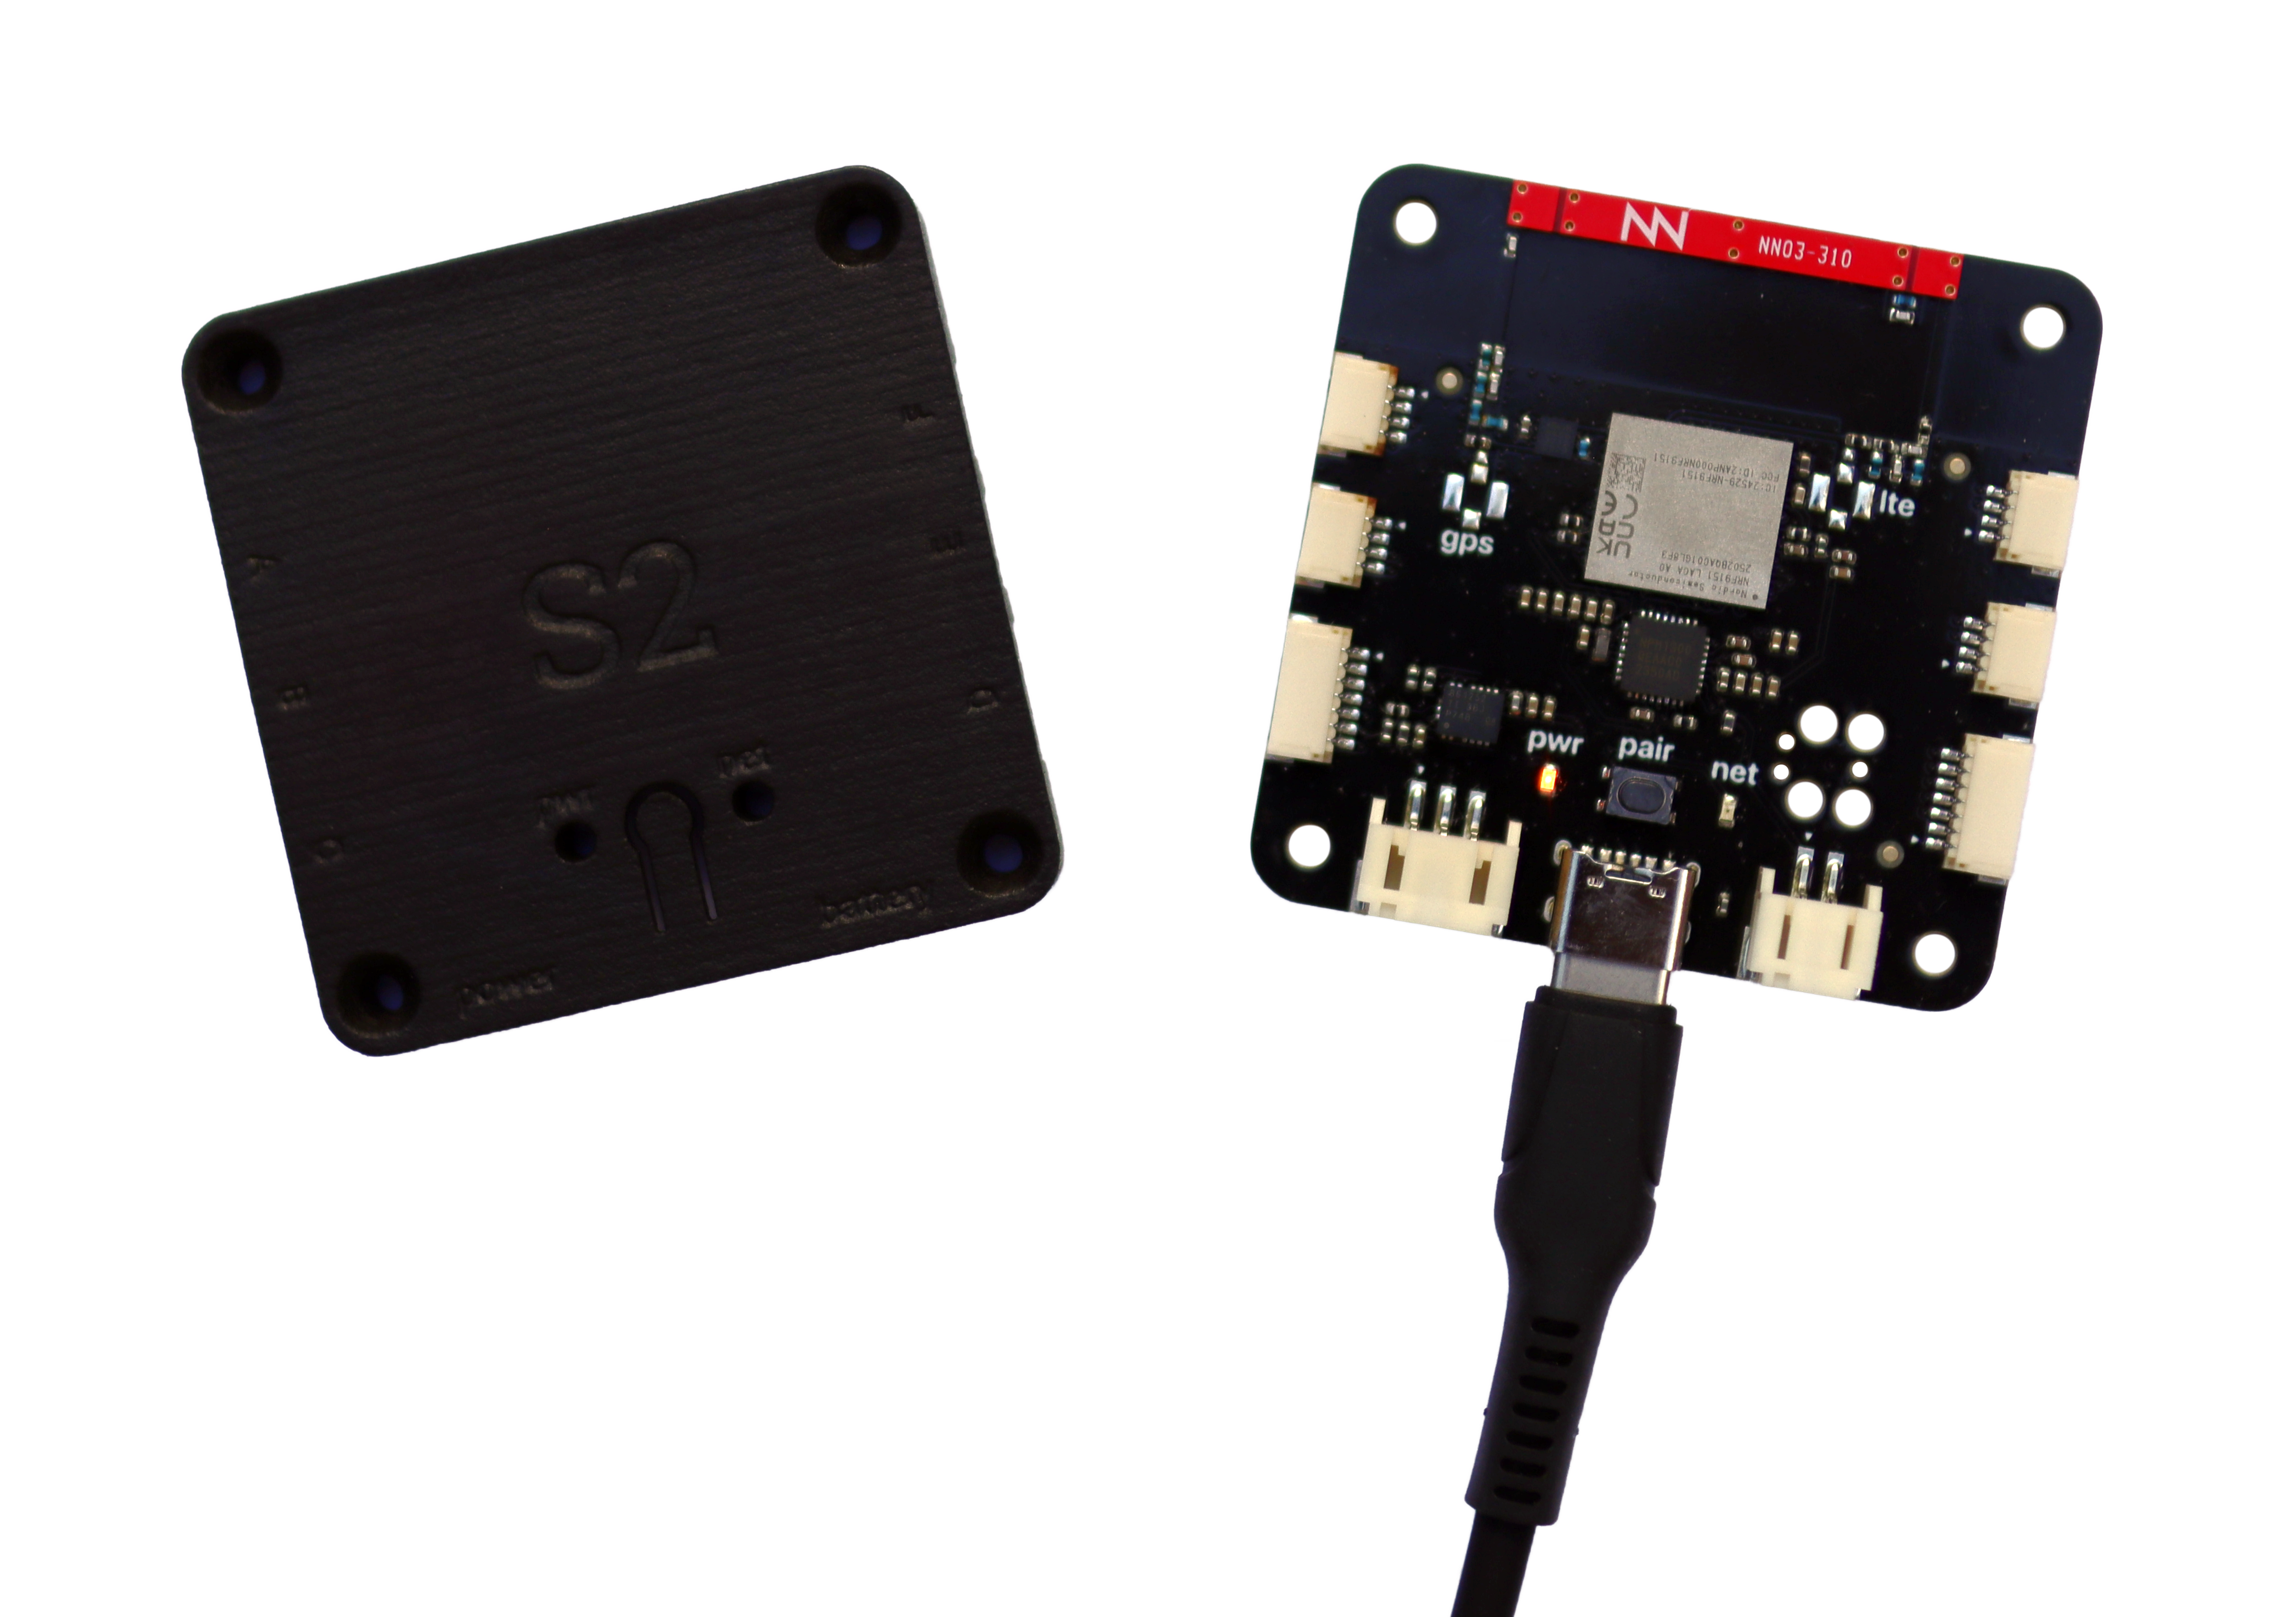
Step 1: Unbox your new S2 Module
The S2 Module is available from DigiKey, with many orders qualifying for free local and international shipping.
Begin by powering your S2 Module using a 5V USB-C power supply. For alternative power options such as lithium batteries, check the detailed documentation.
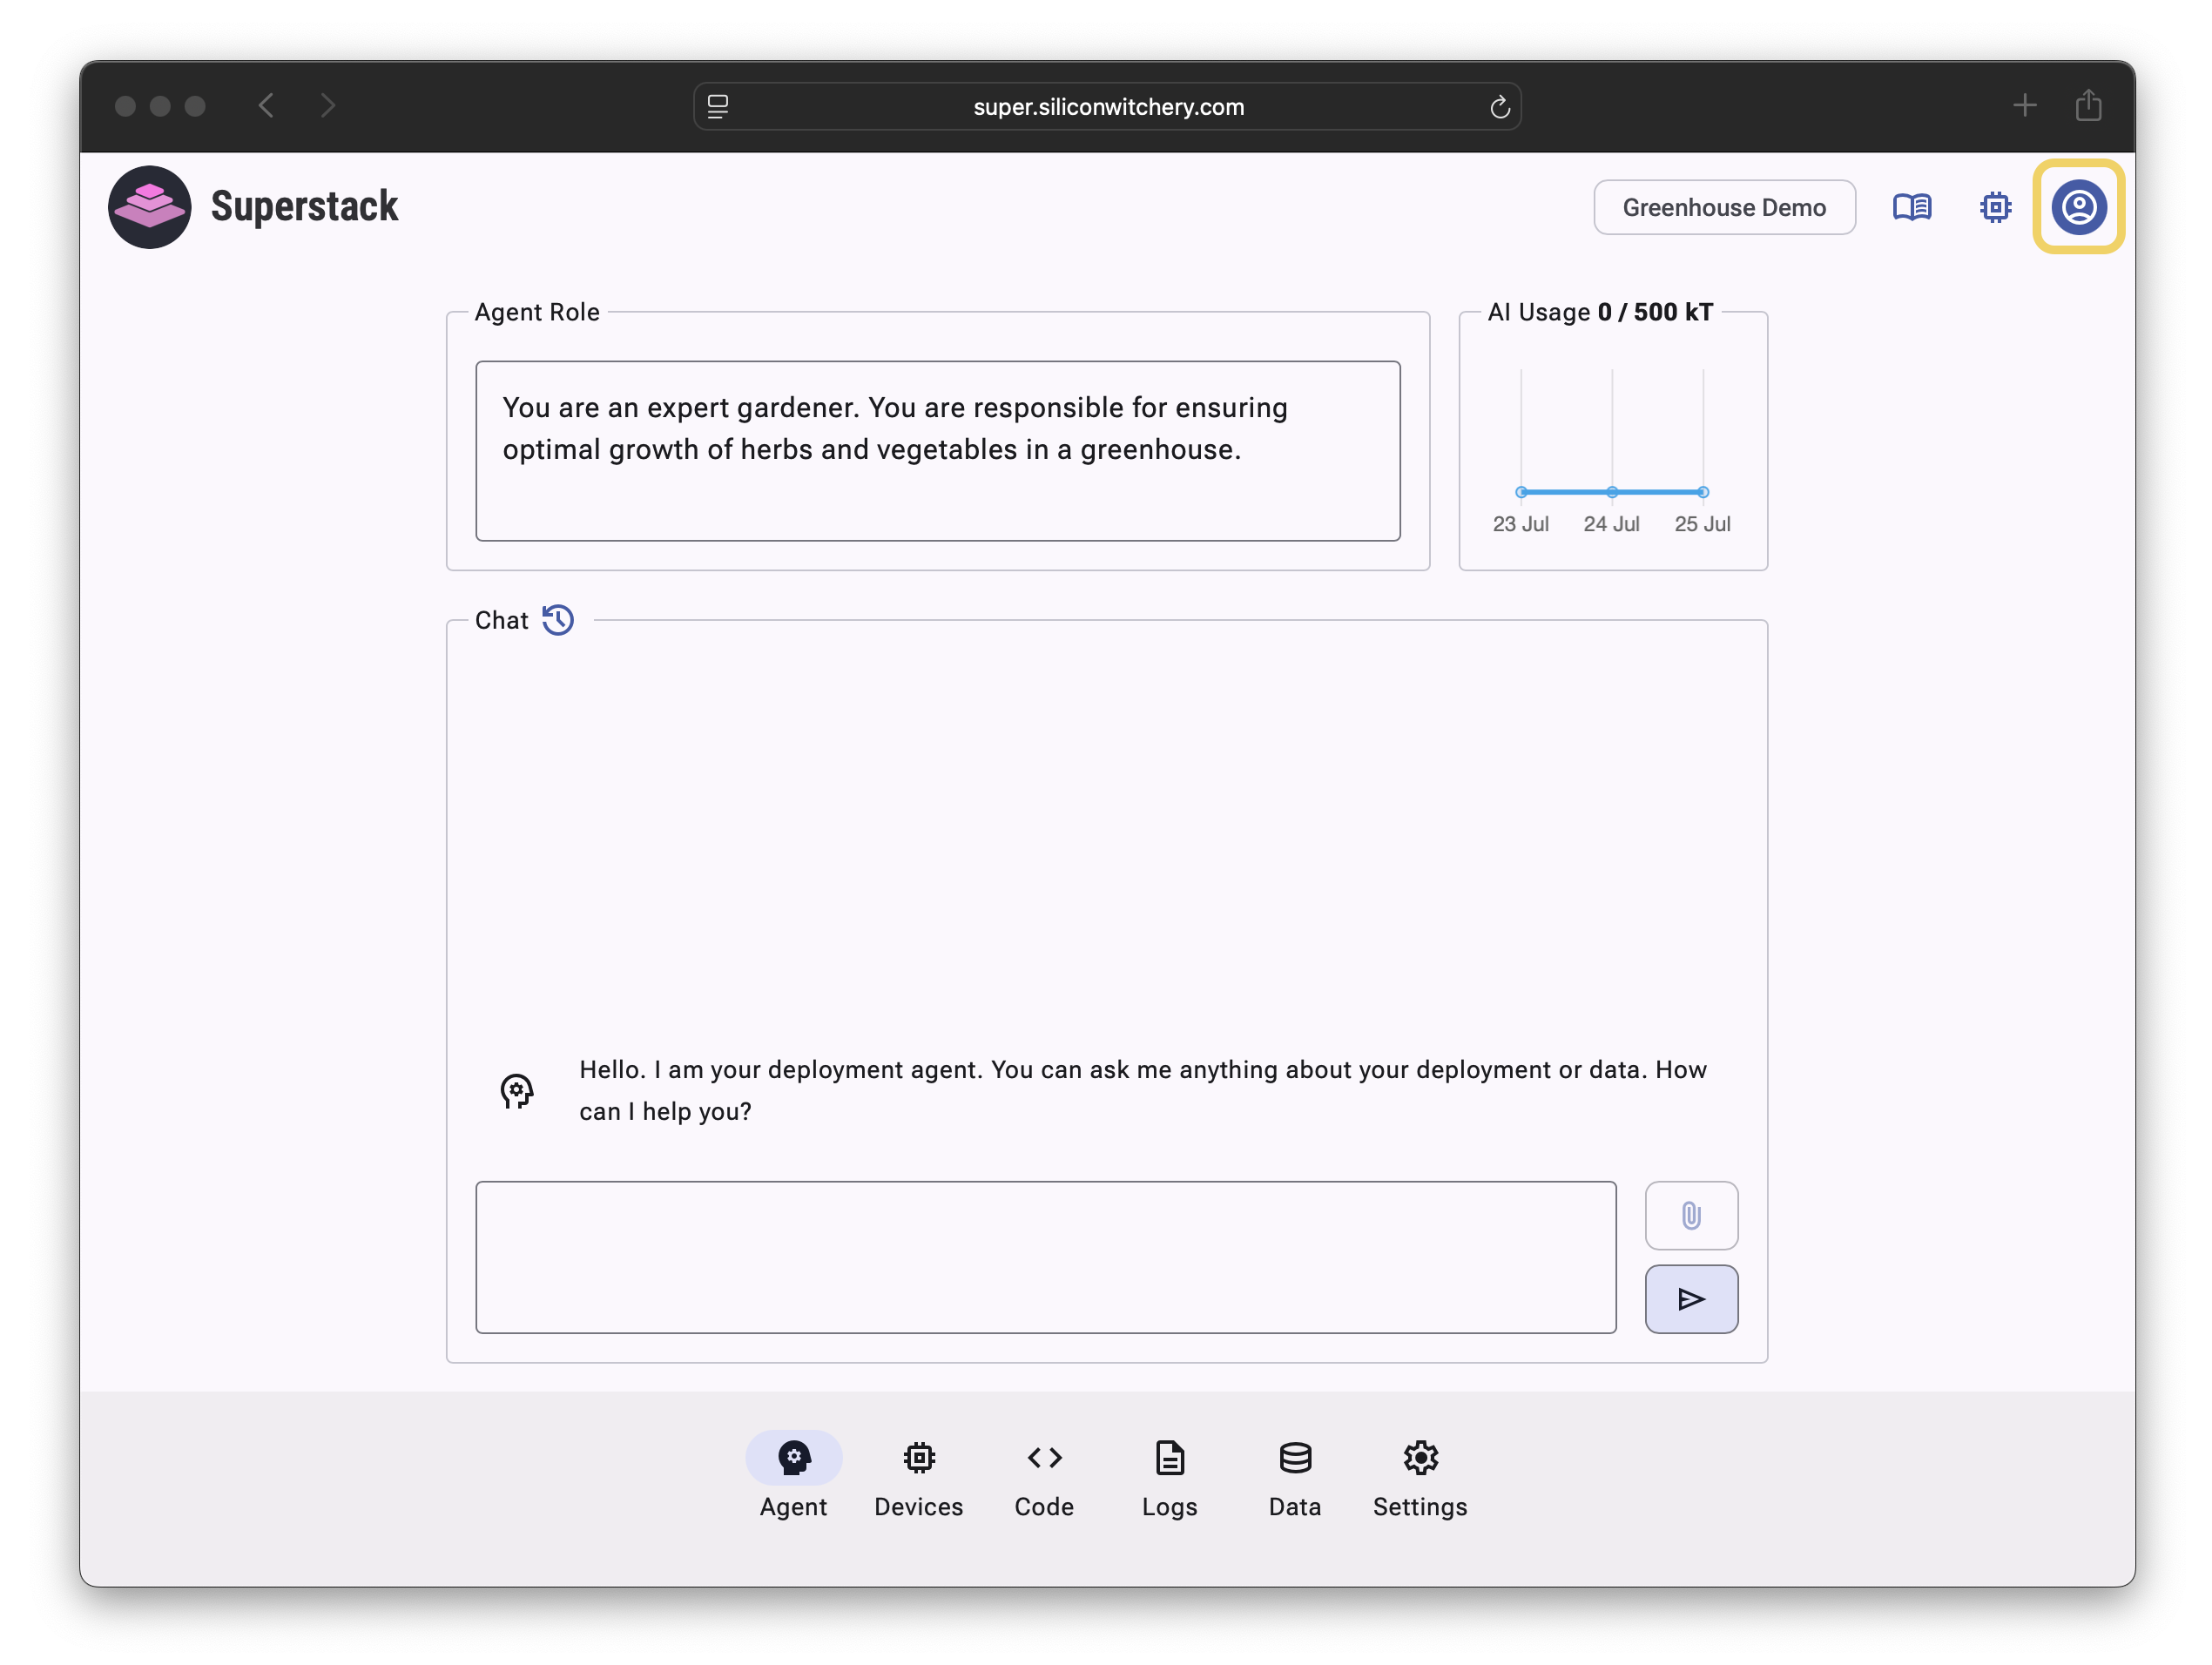
Step 2: Create a Superstack account
Navigate to super.siliconwitchery.com and click the Account icon in the top right corner:
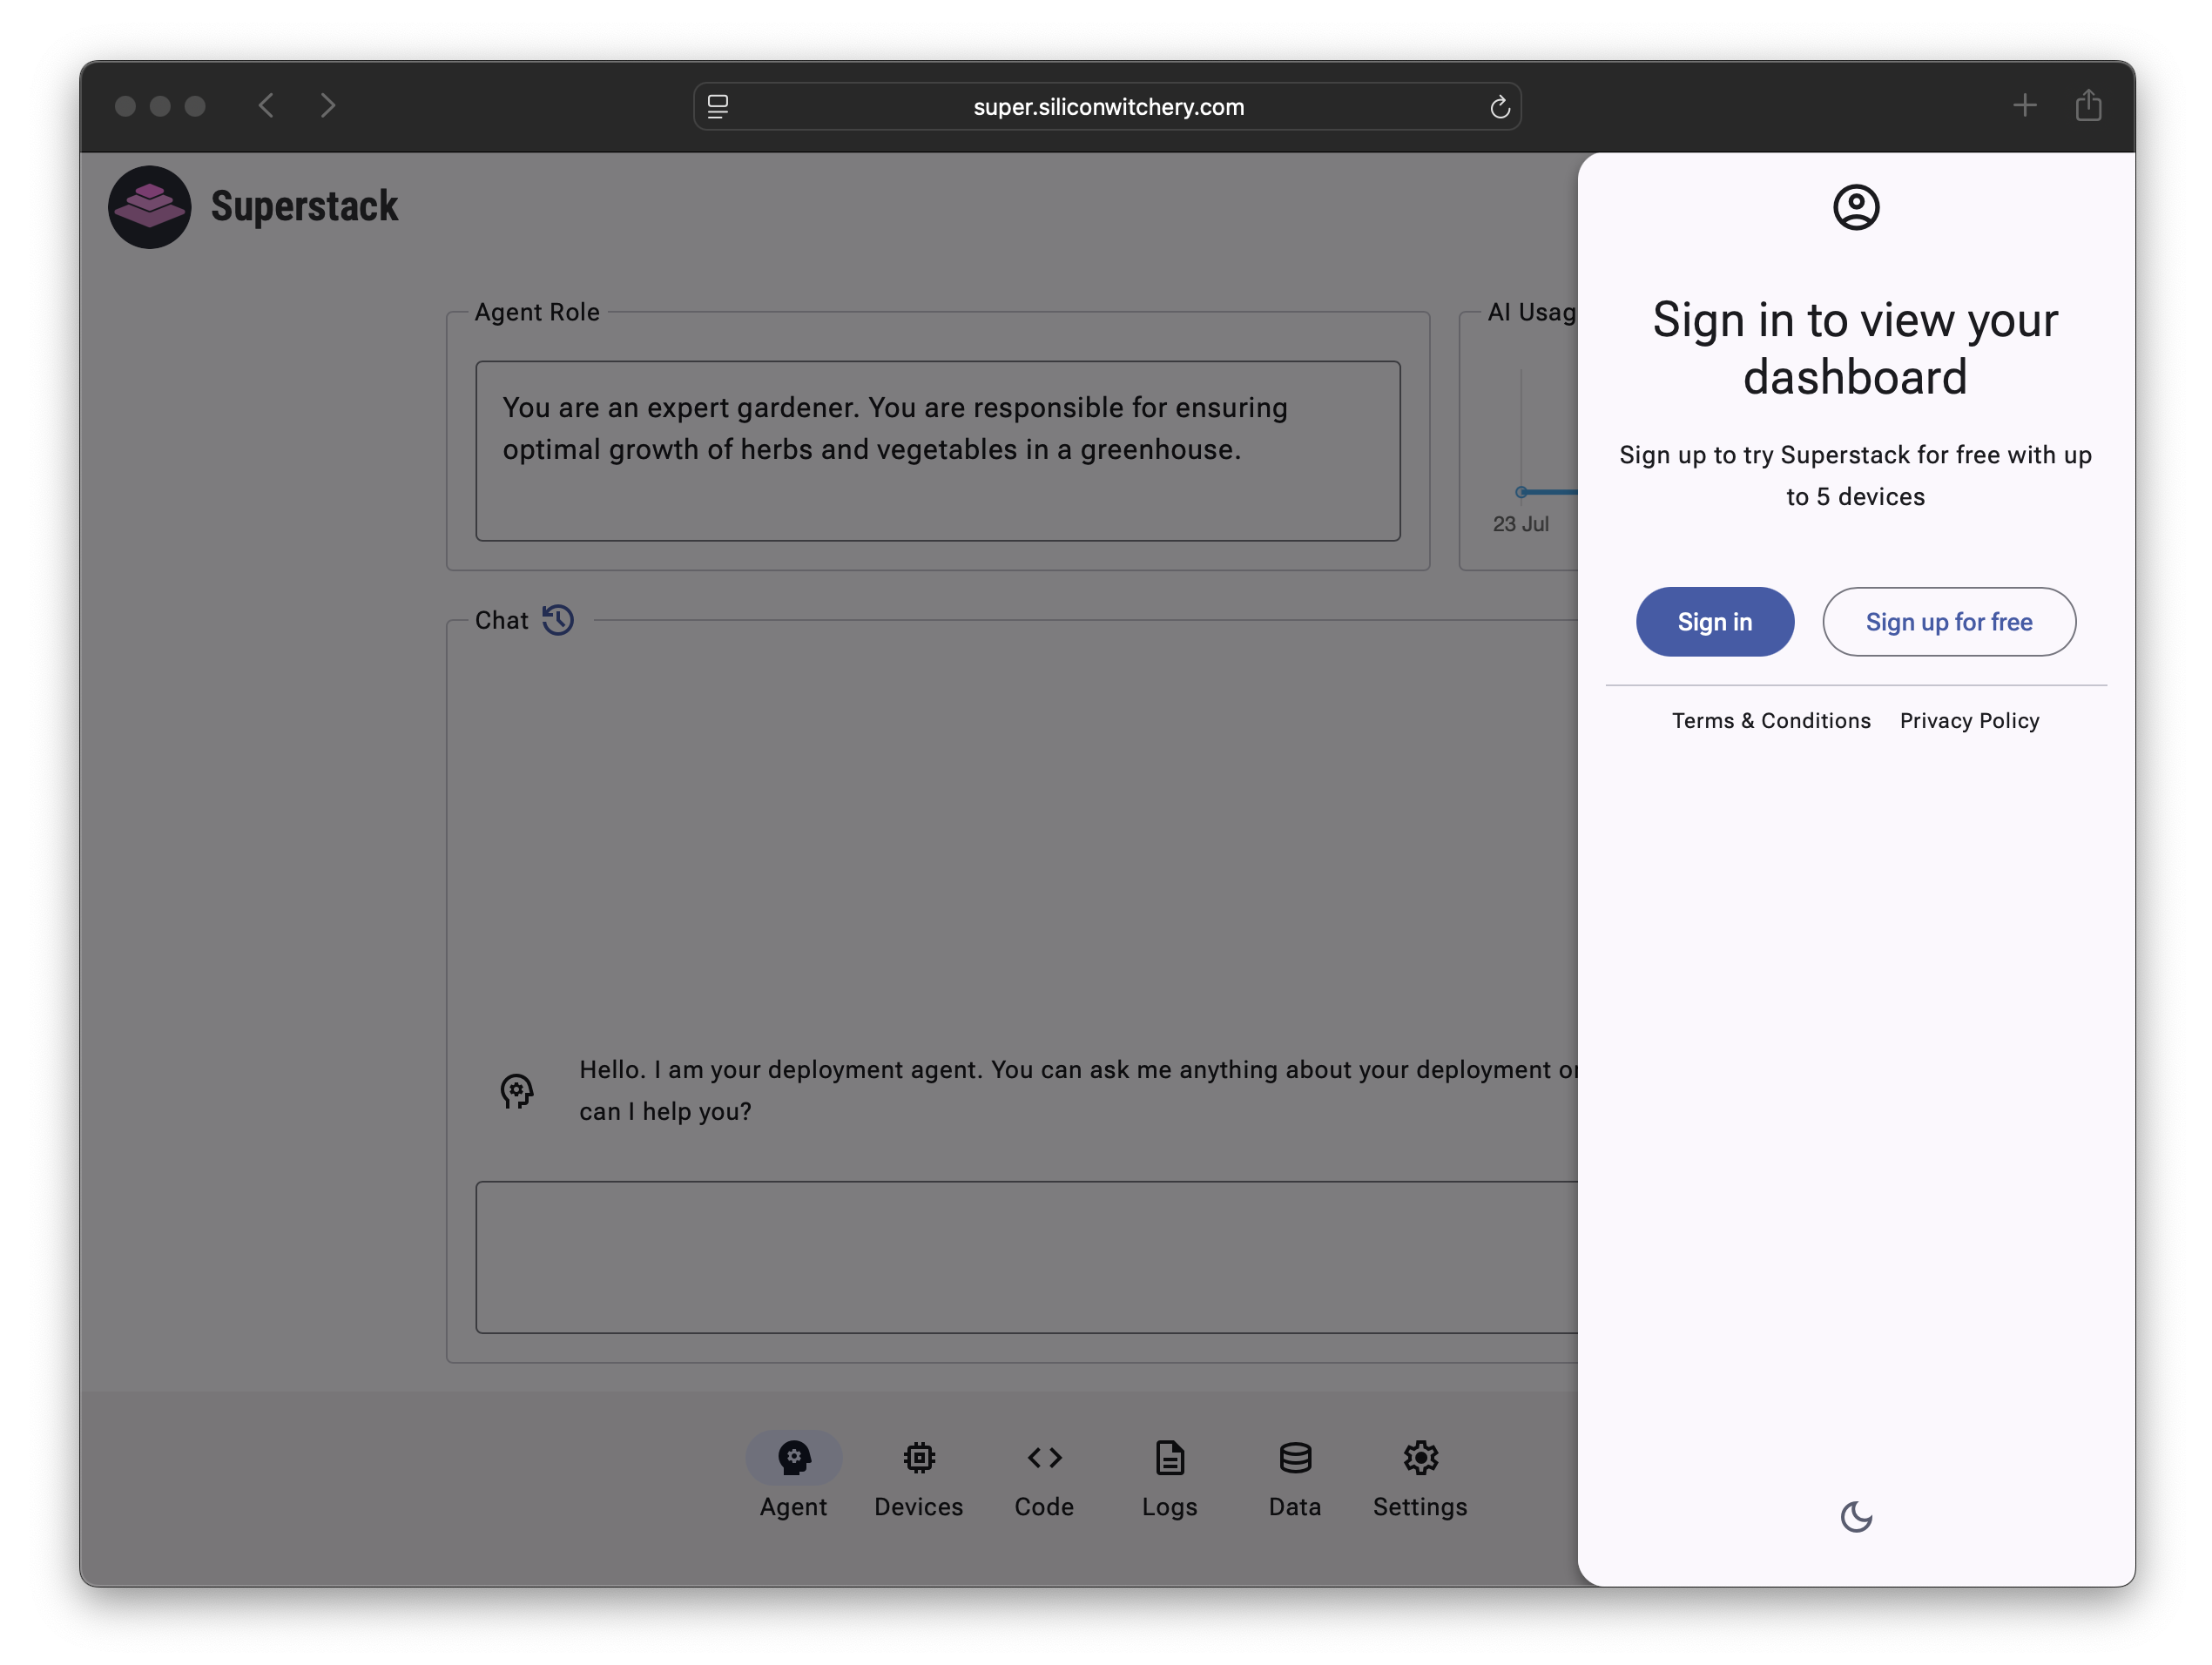
From the Account pane, click Sign up or Sign in:
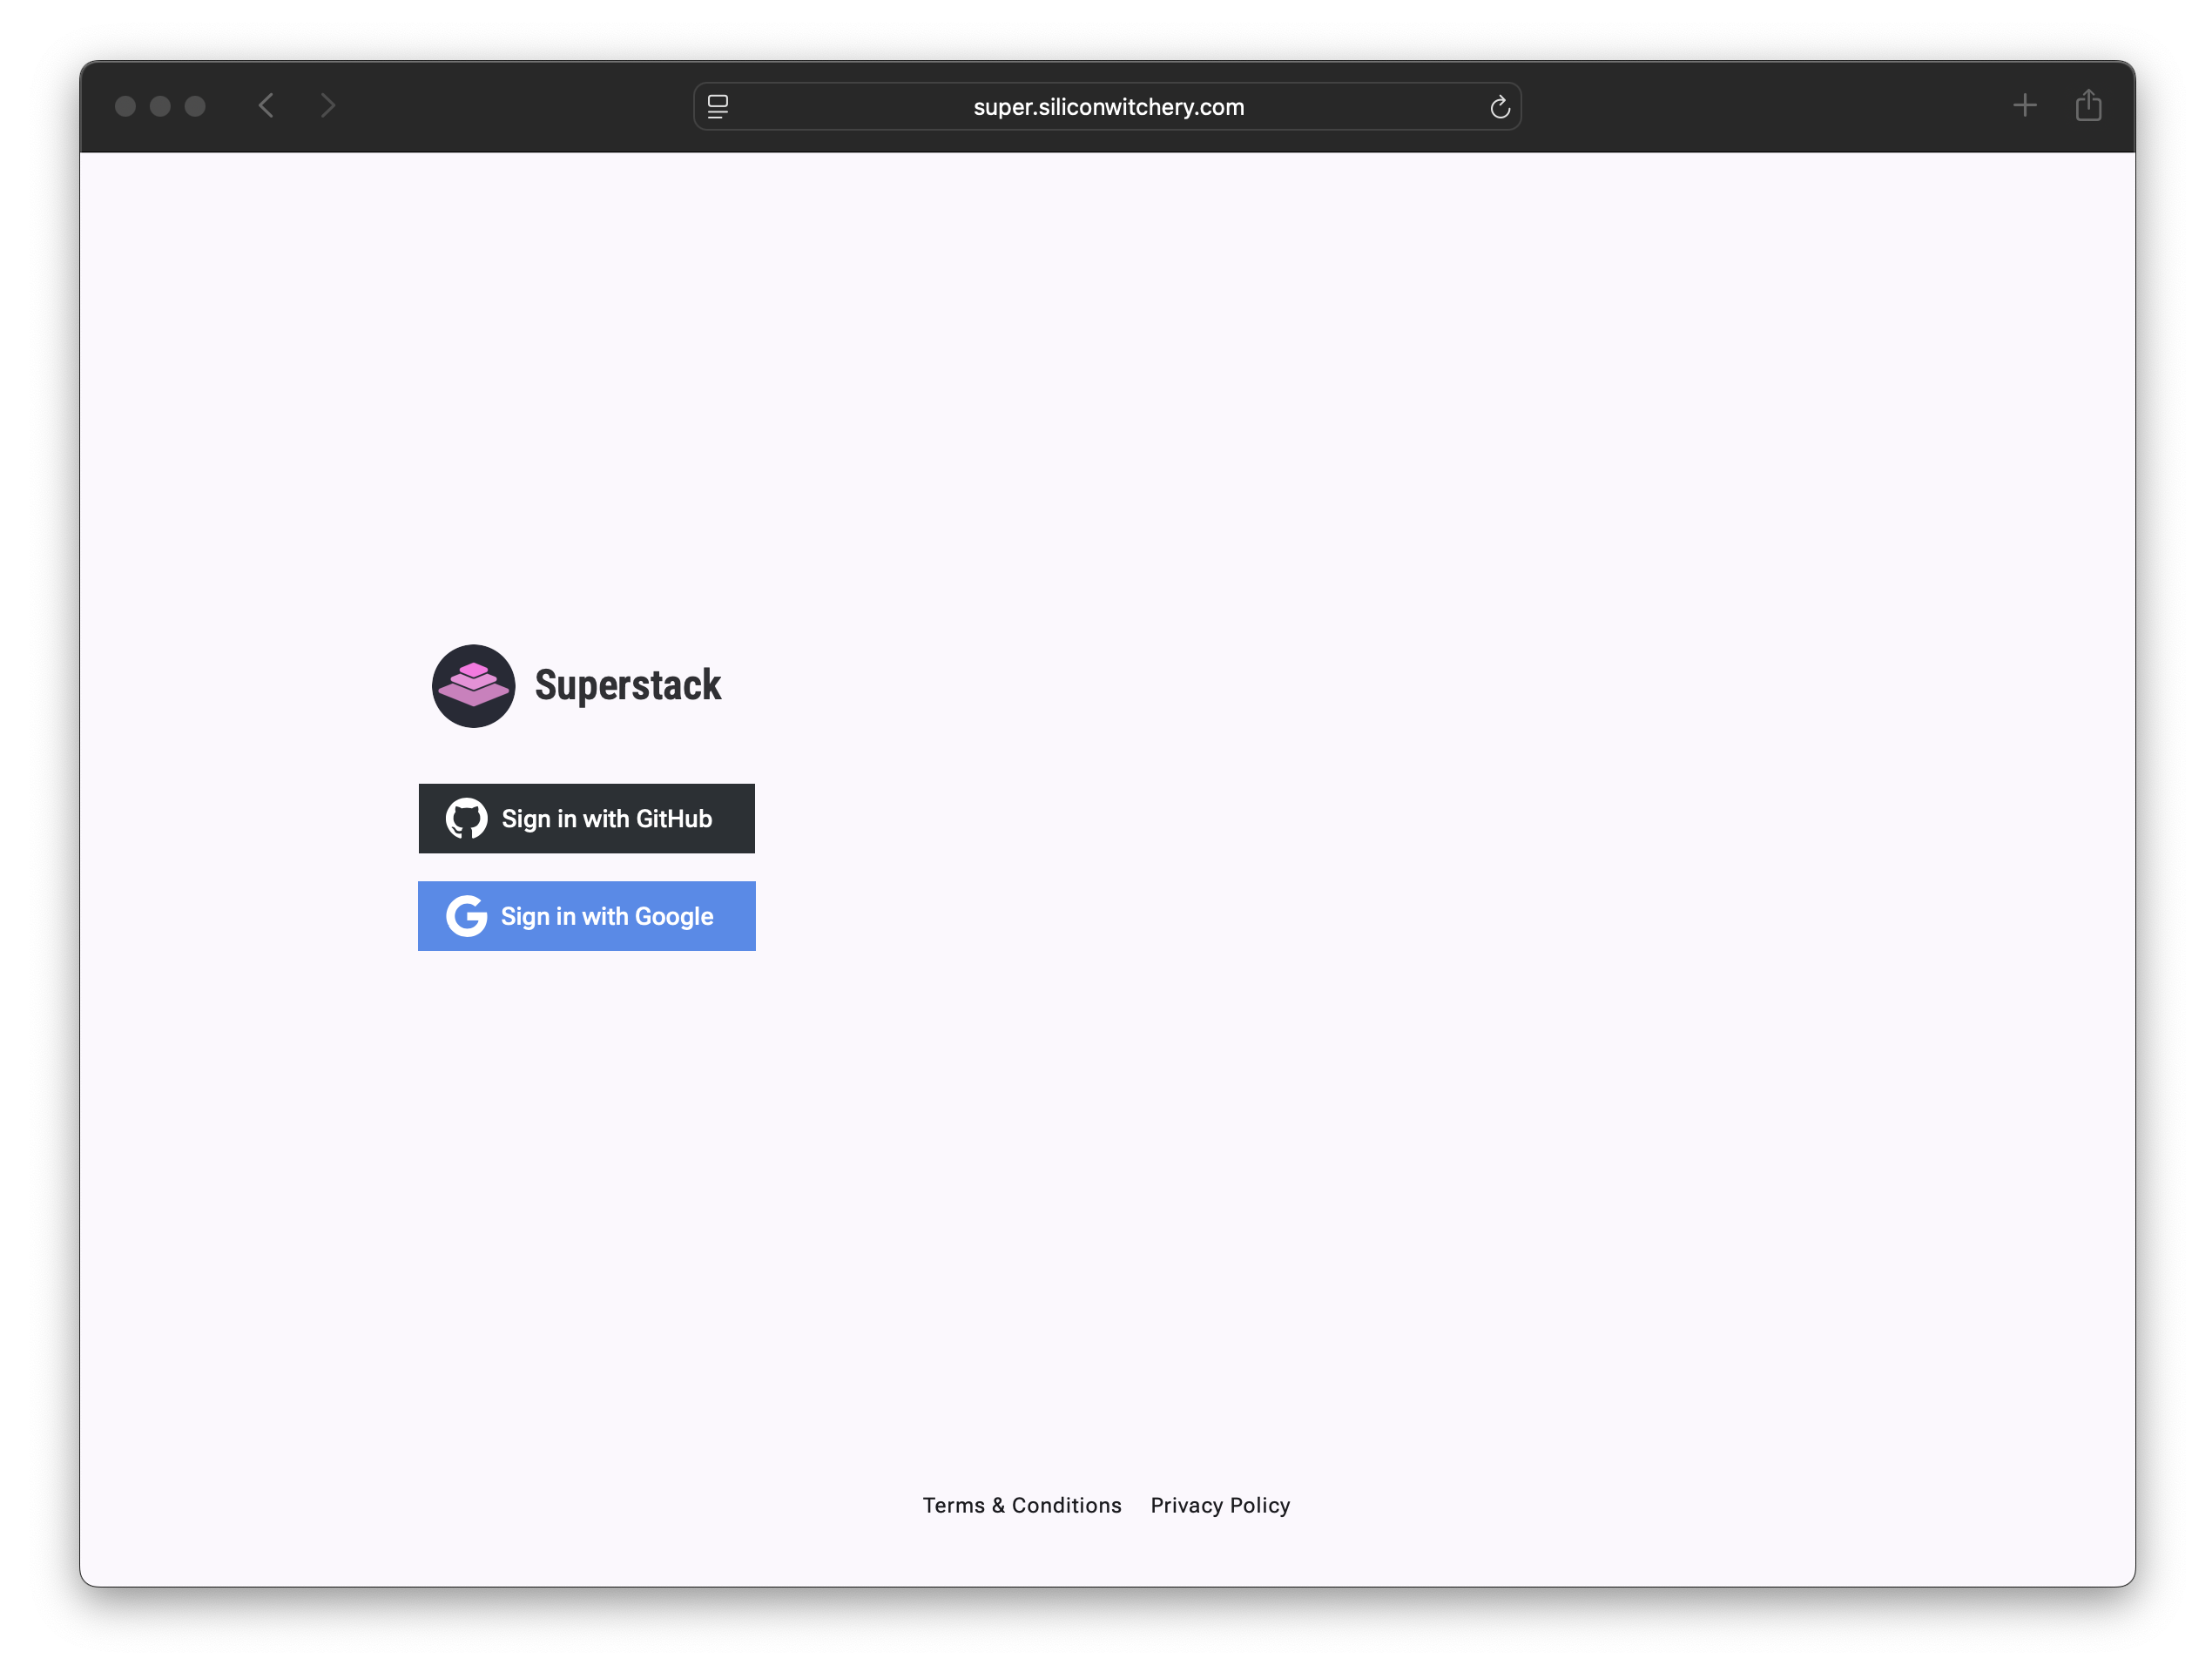
Log in securely using OAuth with GitHub or Google:
Superstack does not gain access to sensitive customer information, passwords, or access tokens. Only your email is used to reference your account.
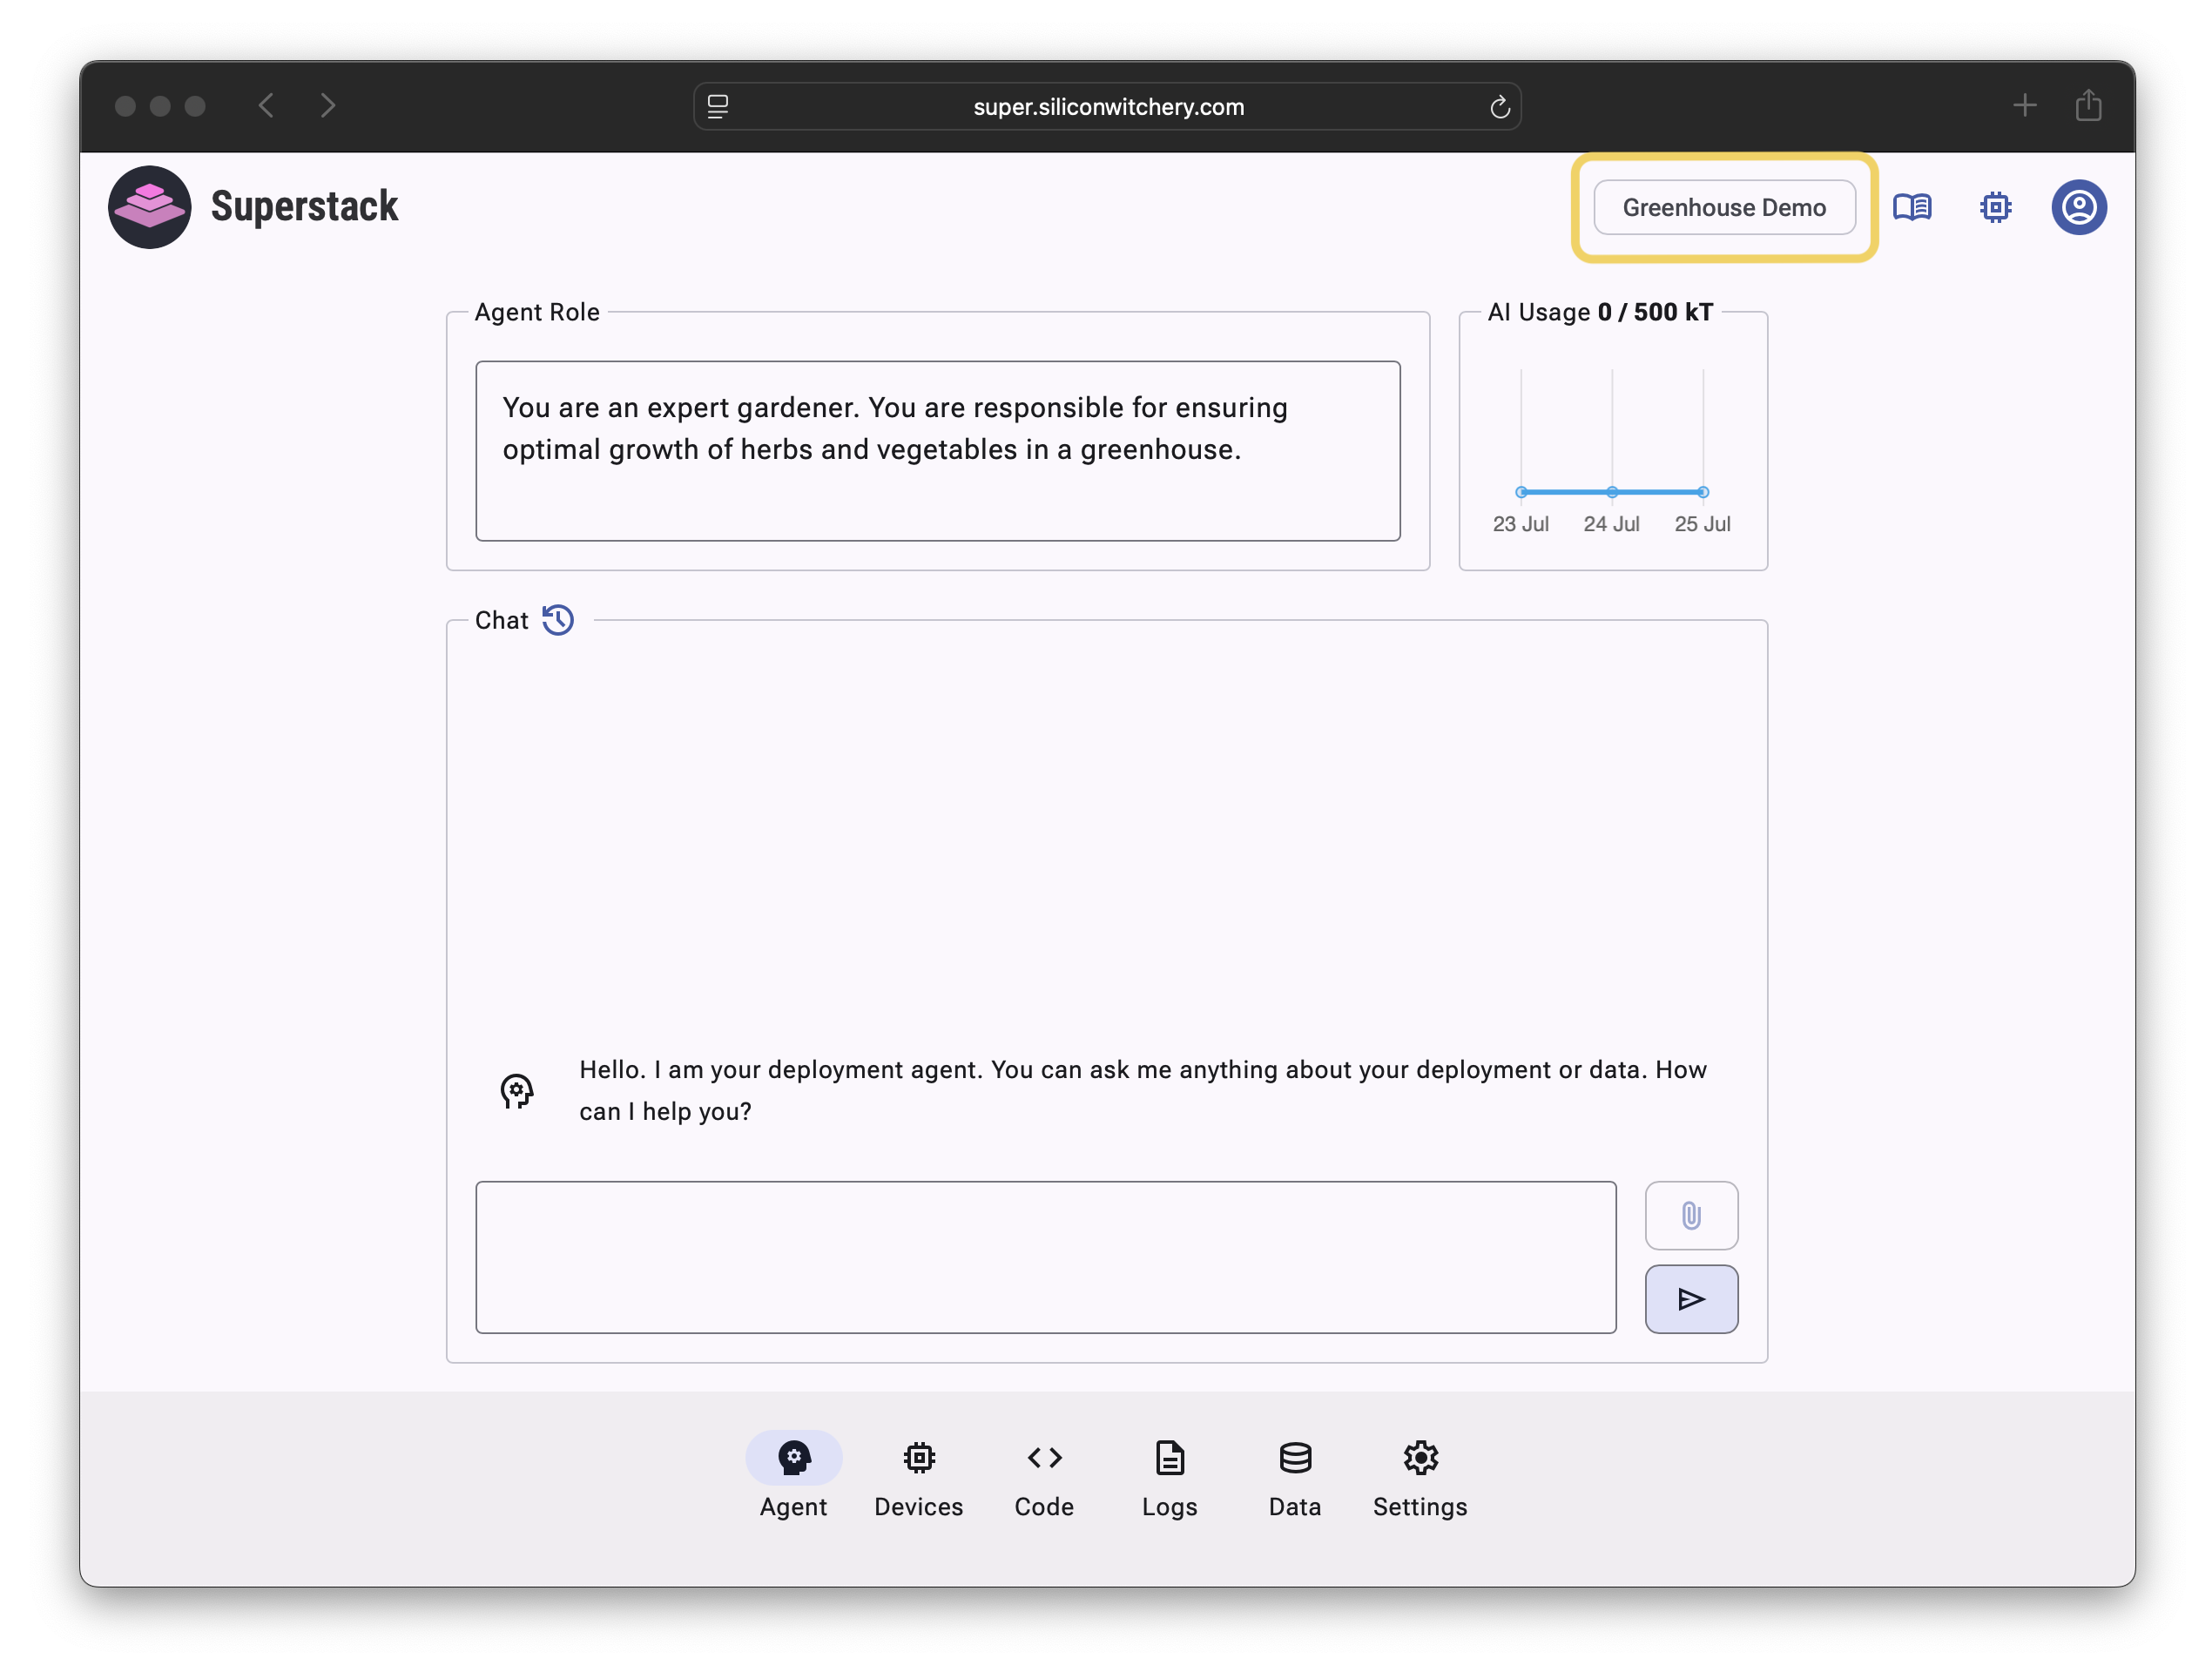
Step 3: Create a new deployment
Click the Deployment name in the top bar to open the deployment selection menu:
Click New deployment:
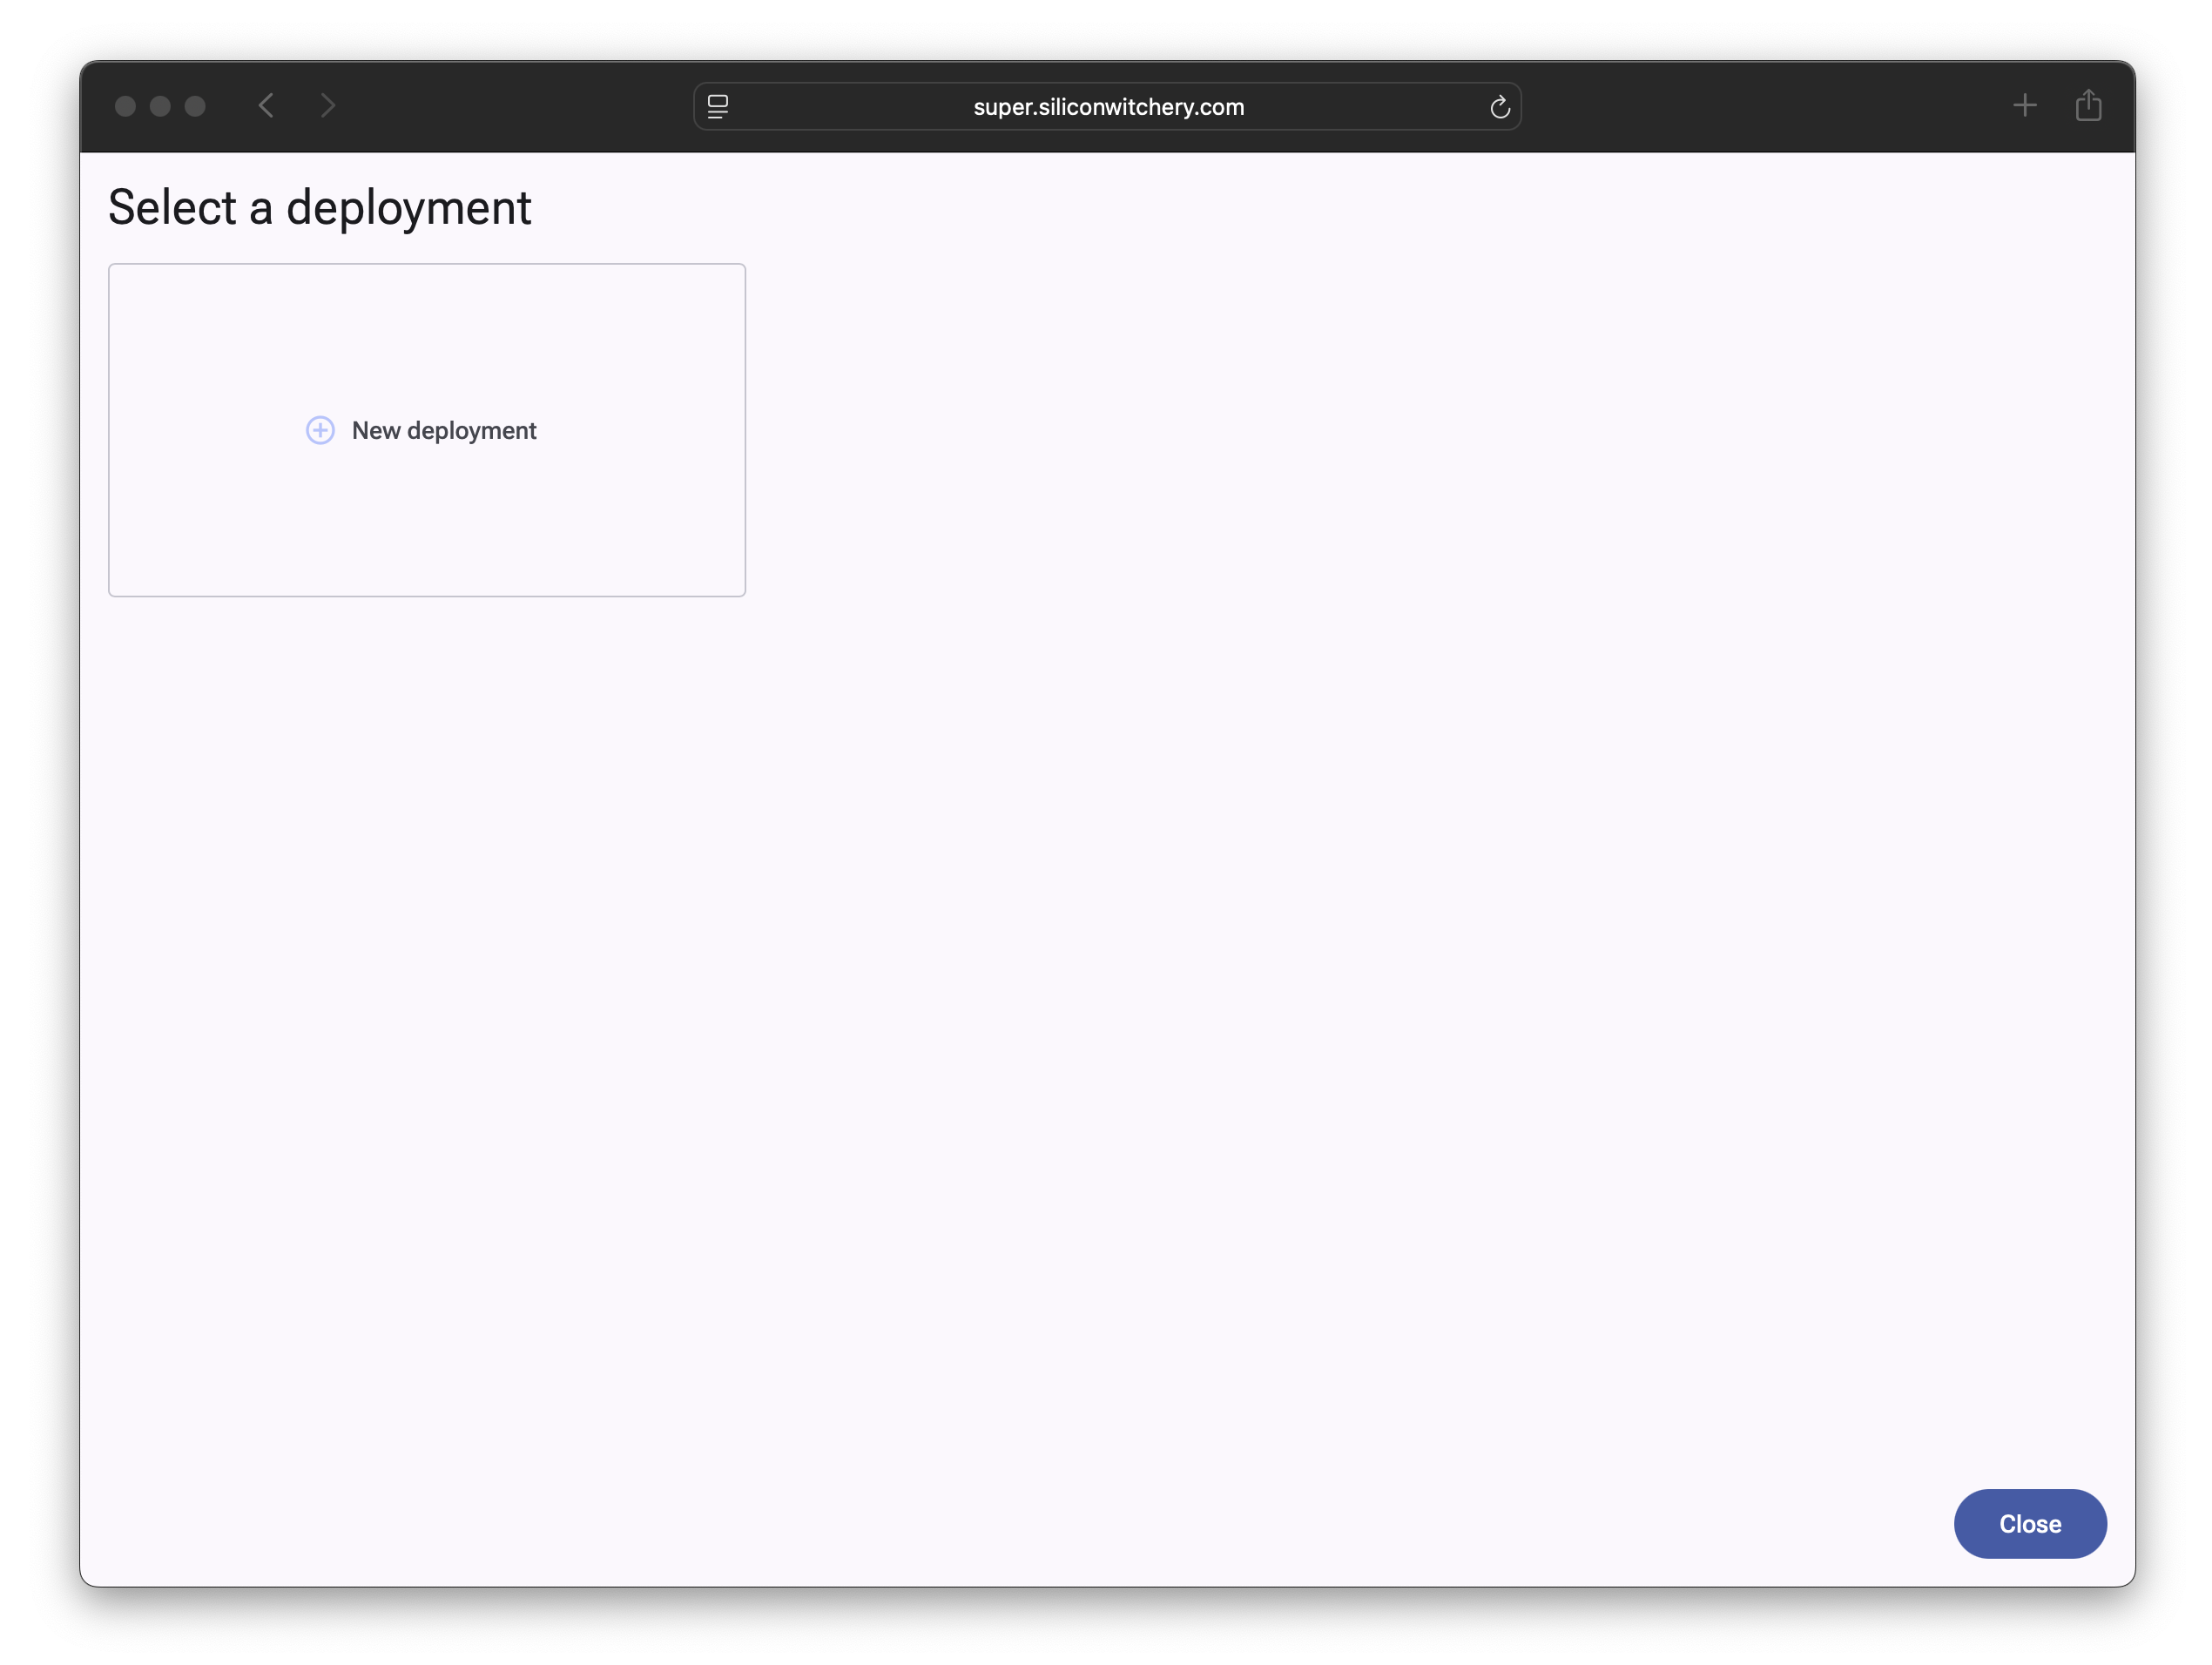
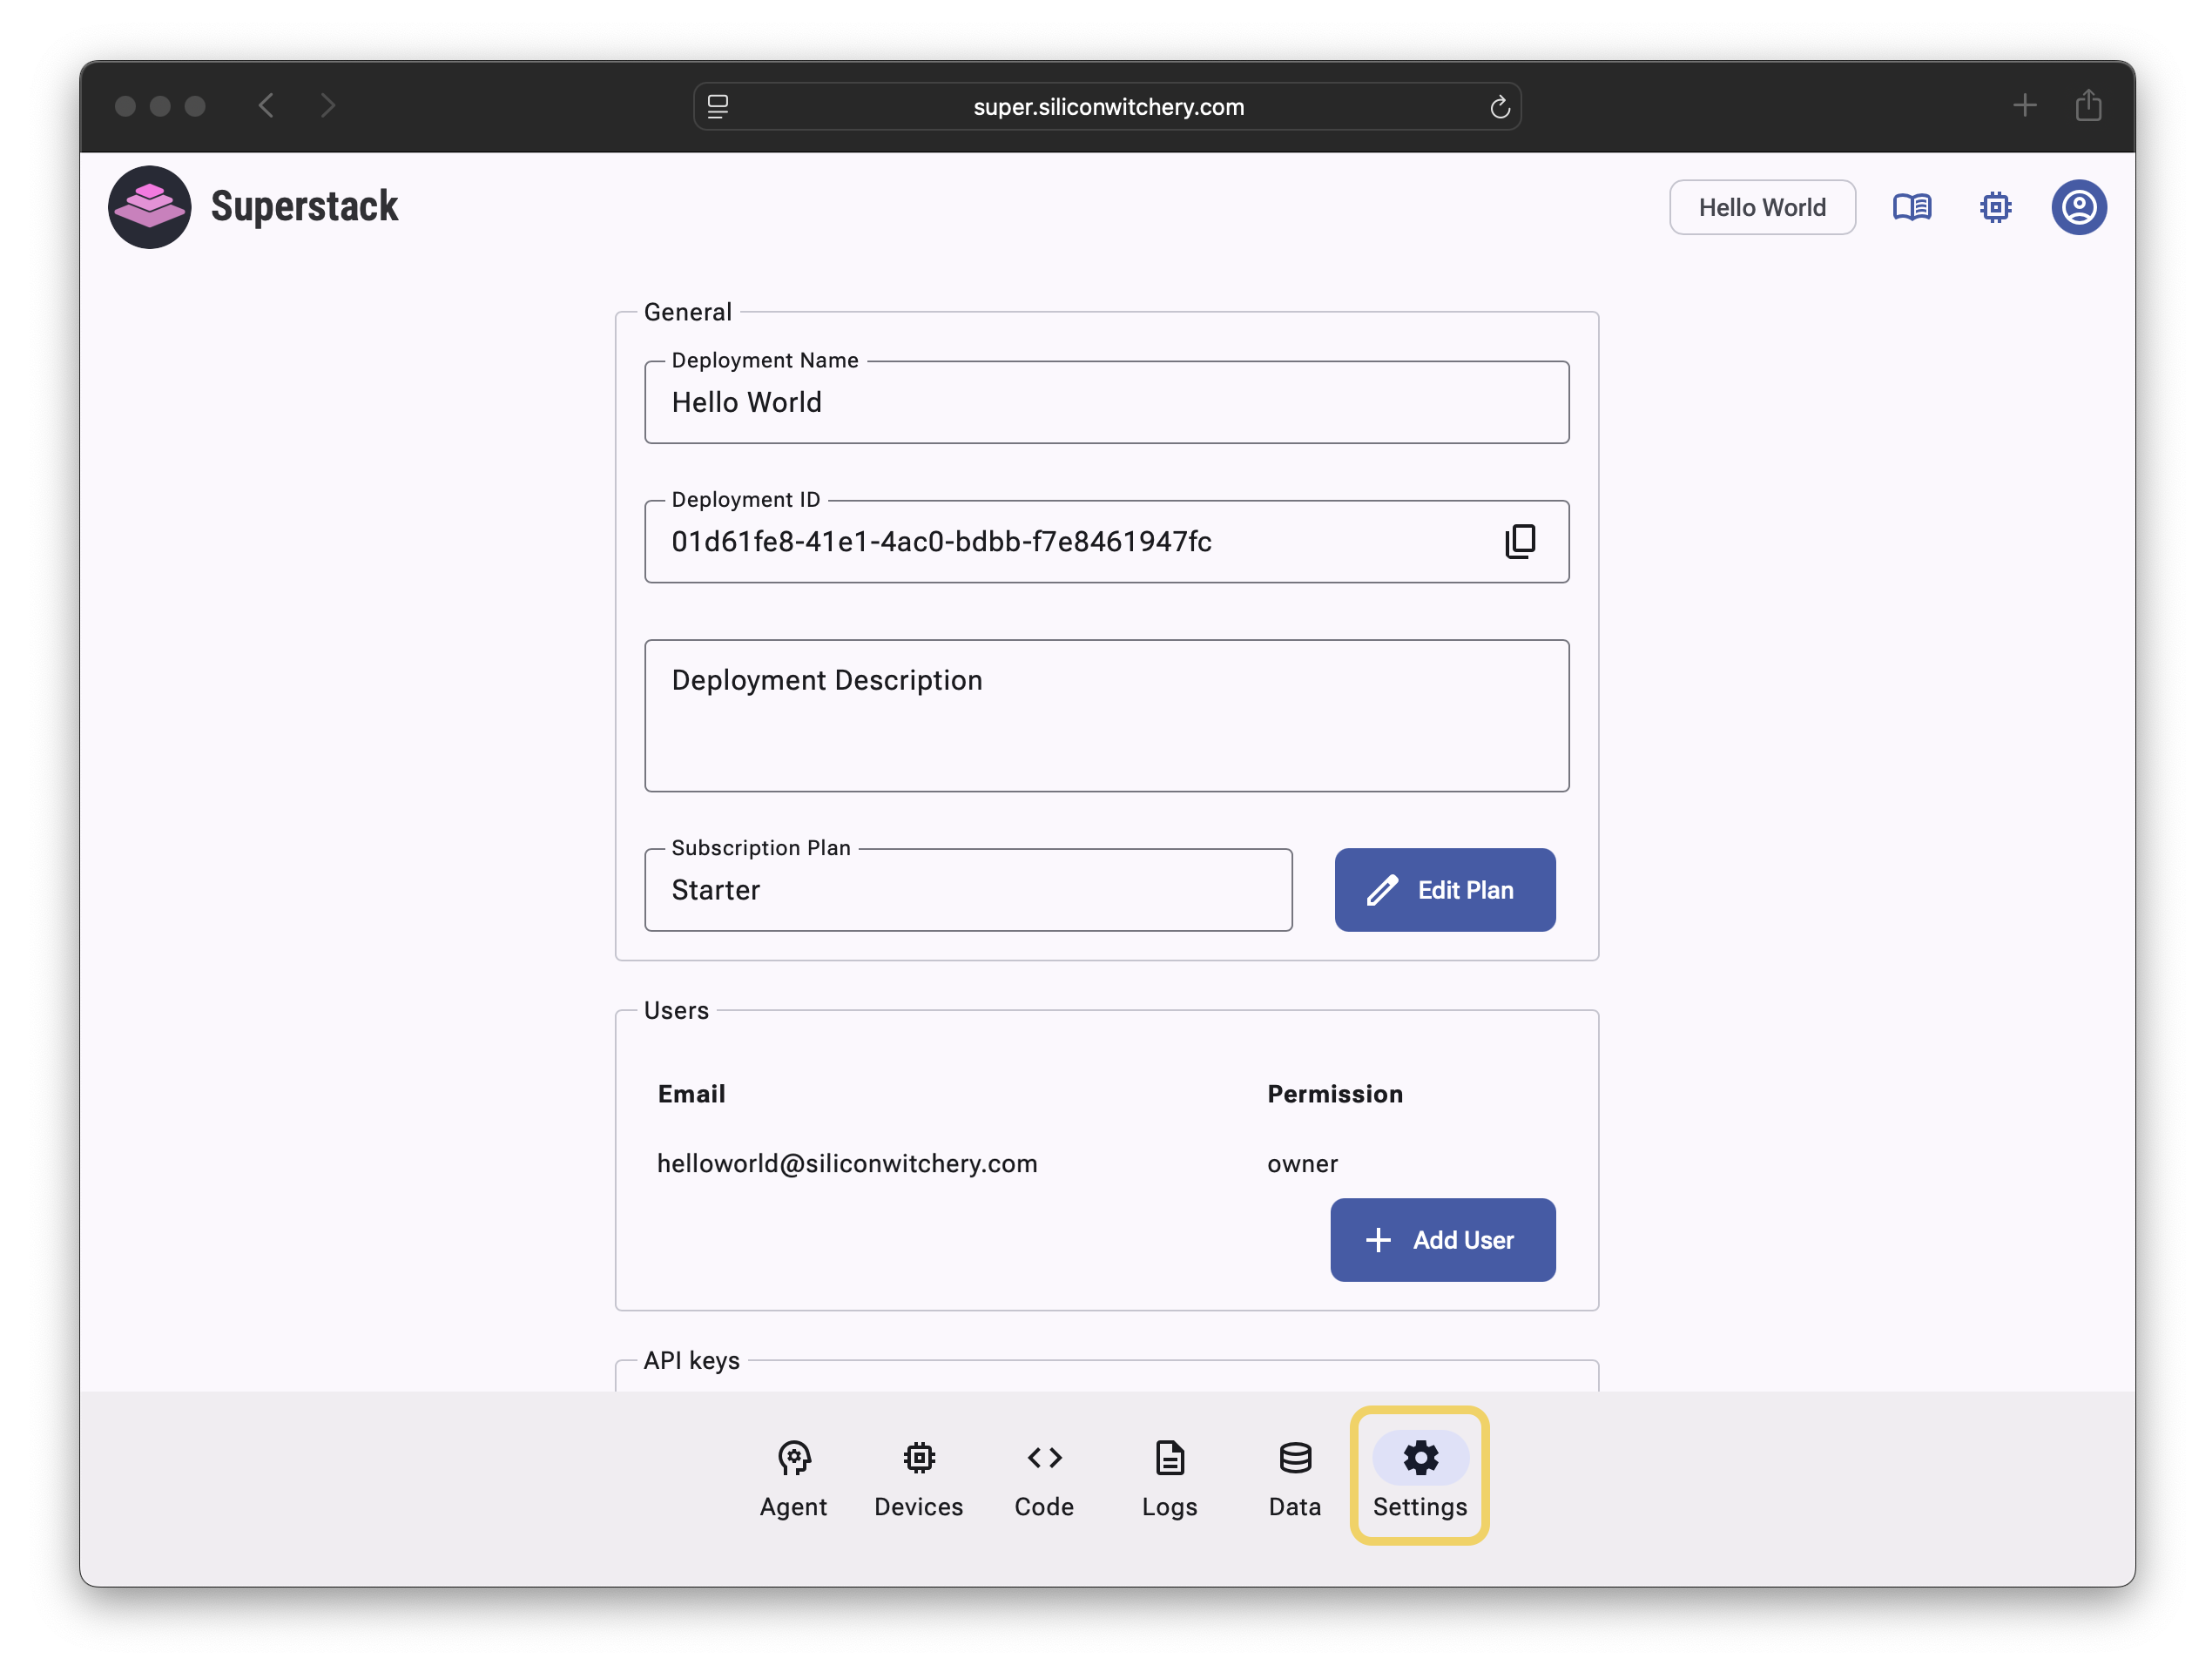
An empty deployment will be created:
You can edit the name and description from the Settings Tab, as well as add additional users if desired.
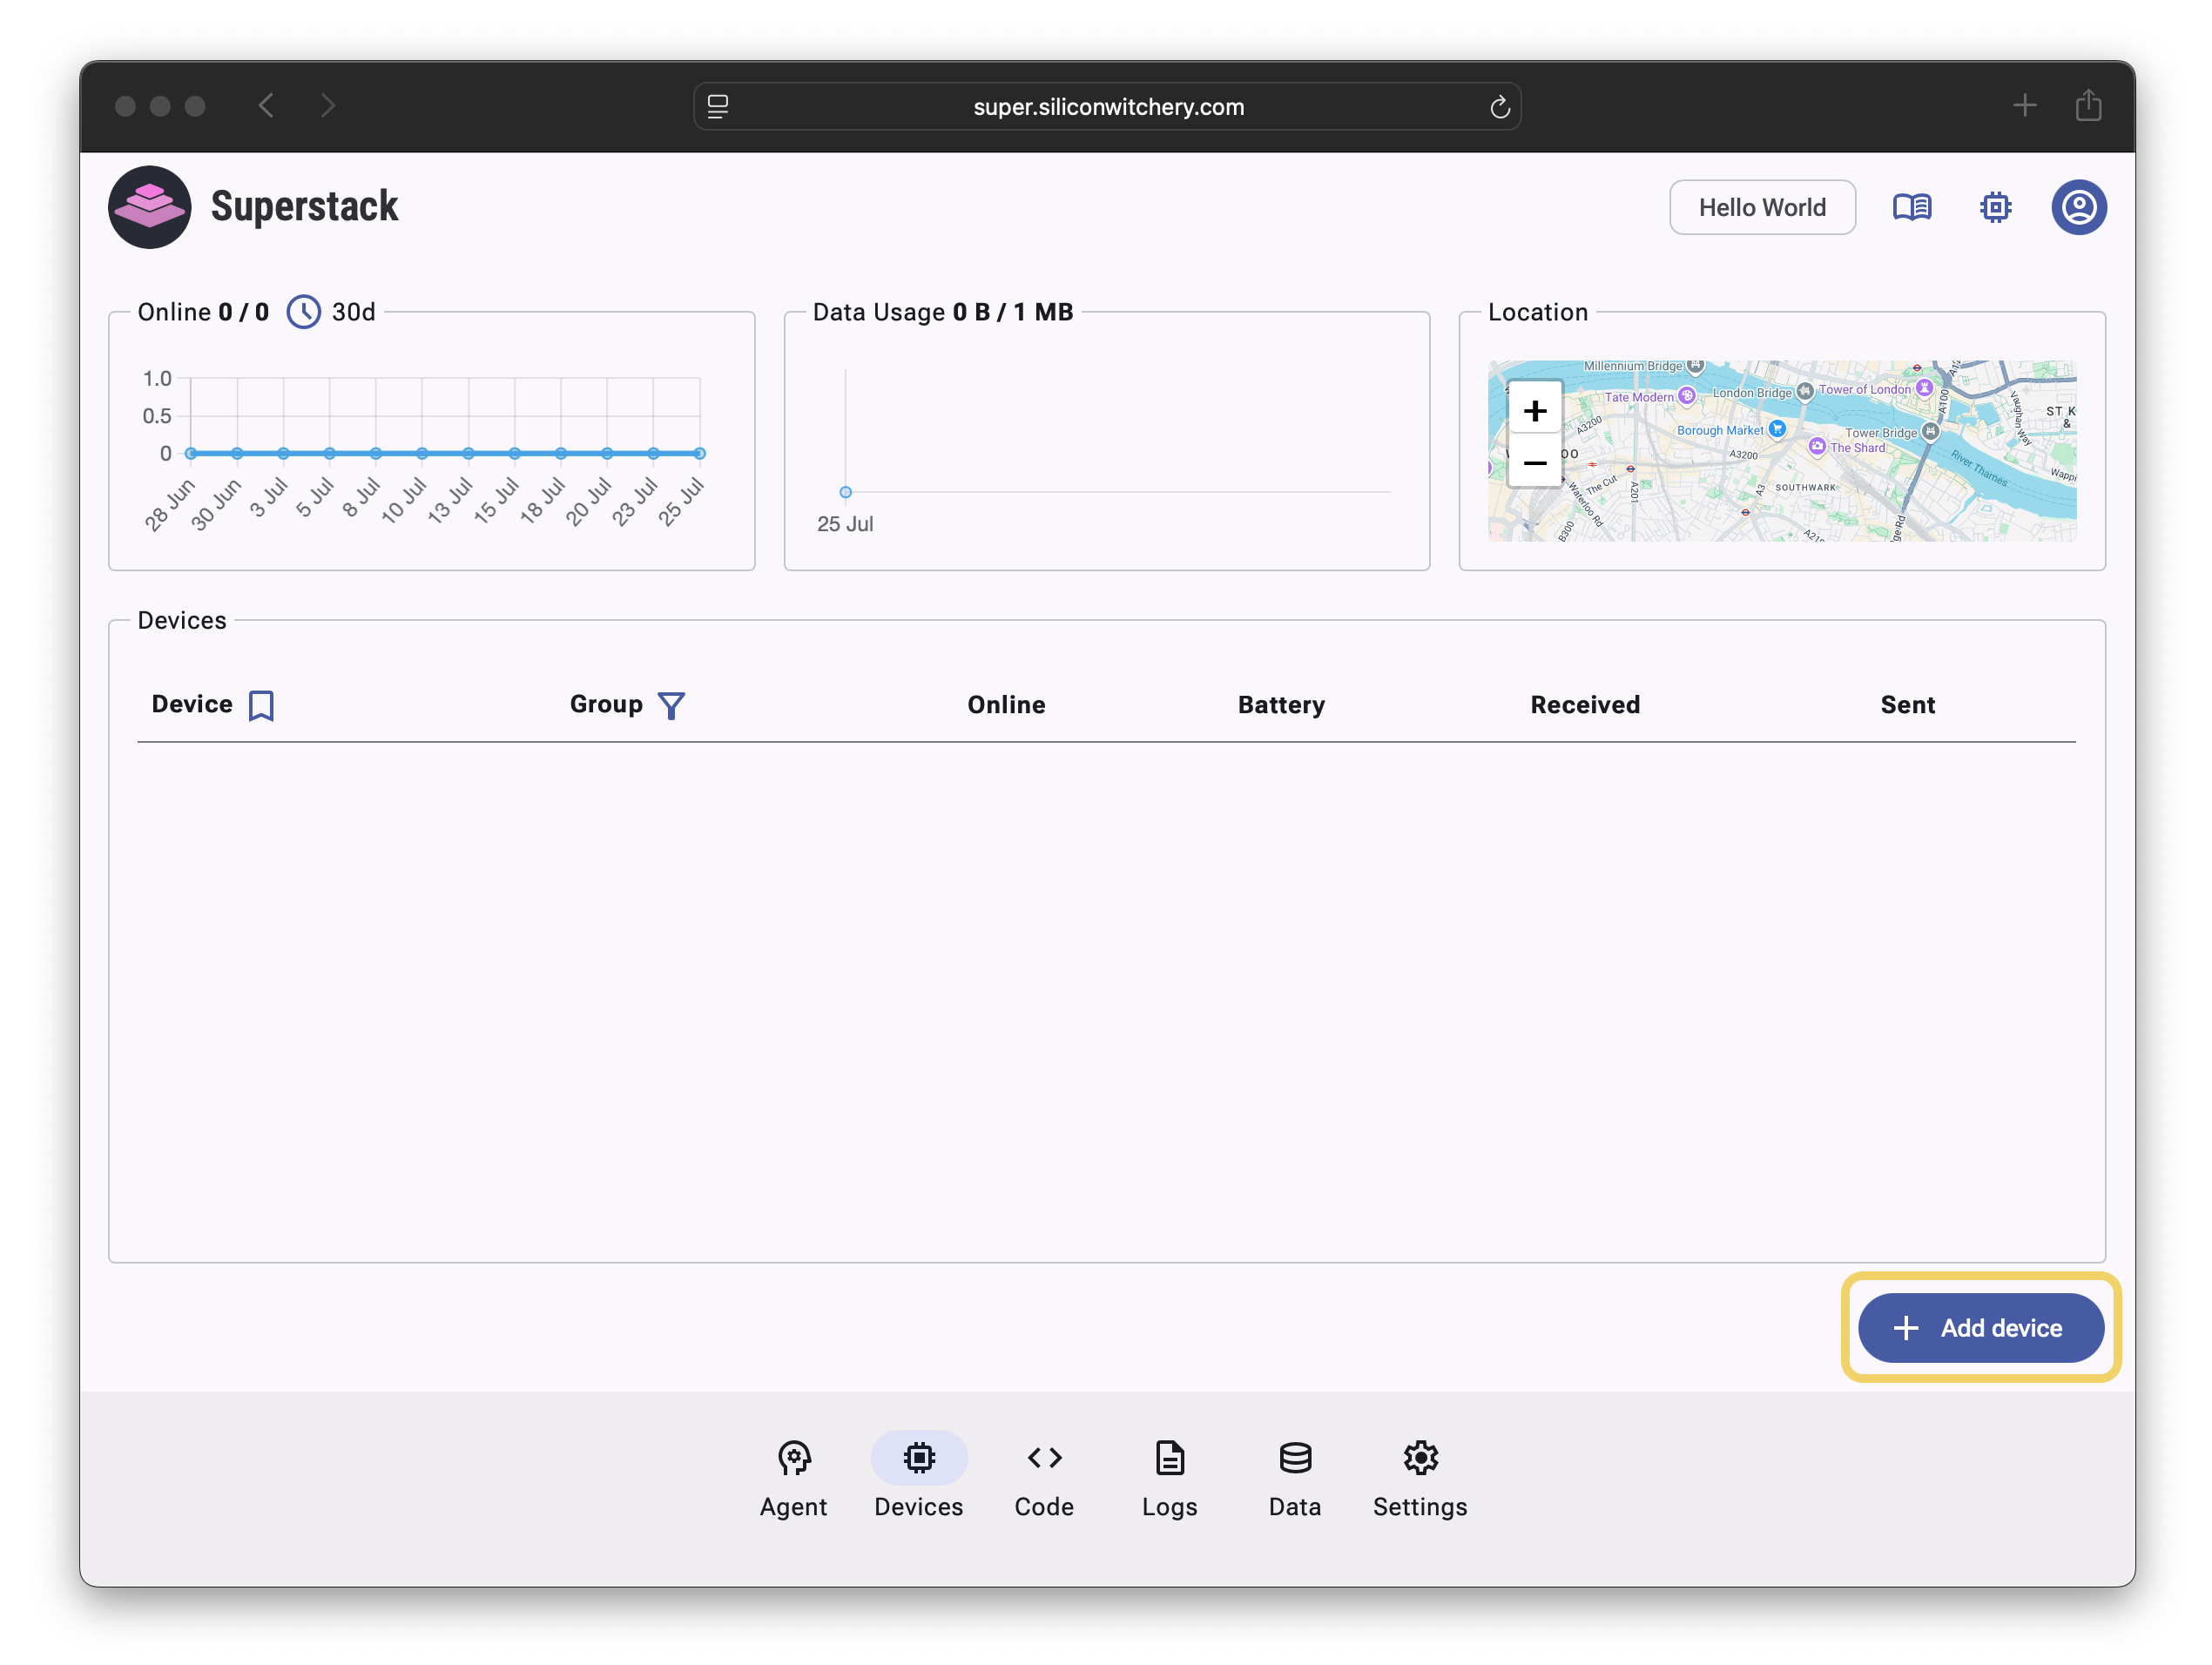
Step 4: Adding Devices
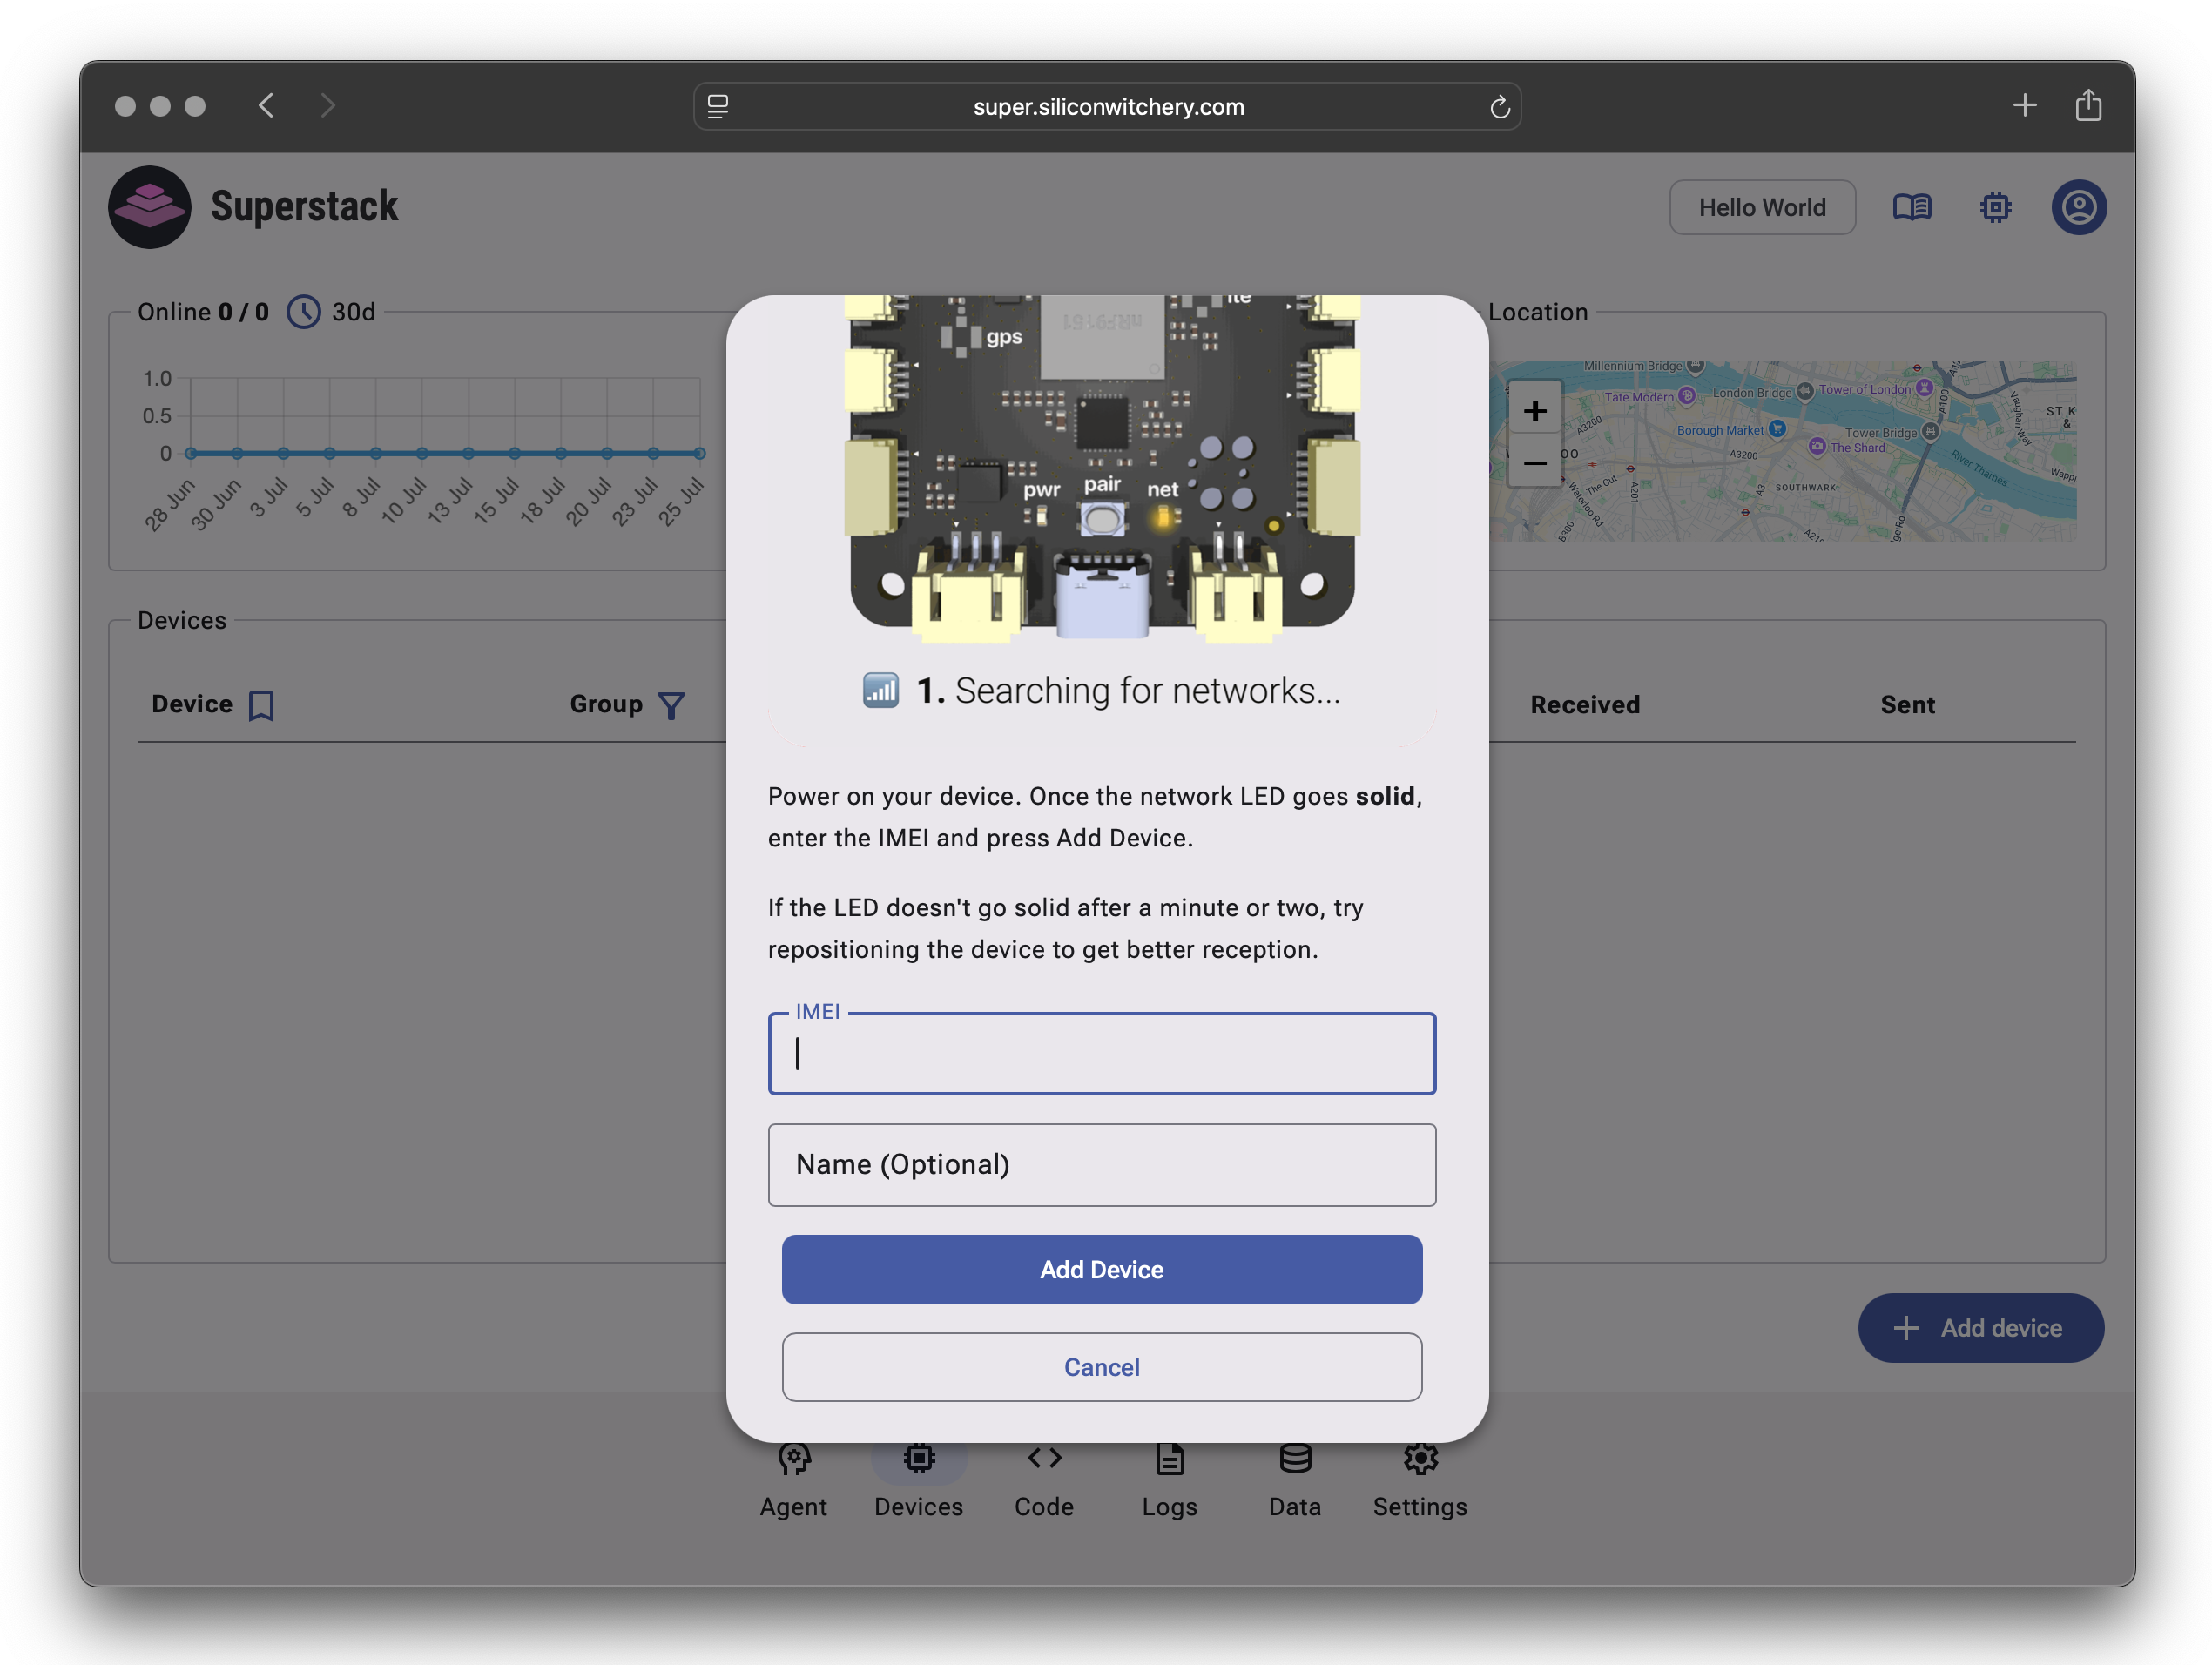
To add your S2 Module, navigate to the Devices tab and click Add device:
Enter your device’s IMEI and optionally assign a name for easy reference.
Then wait for the net LED on the S2 Module to go solid, and then click Add device:
If the net LED does not go solid after 5 minutes of being powered on, try to relocate the device for better cellular coverage, and then re-power the device.
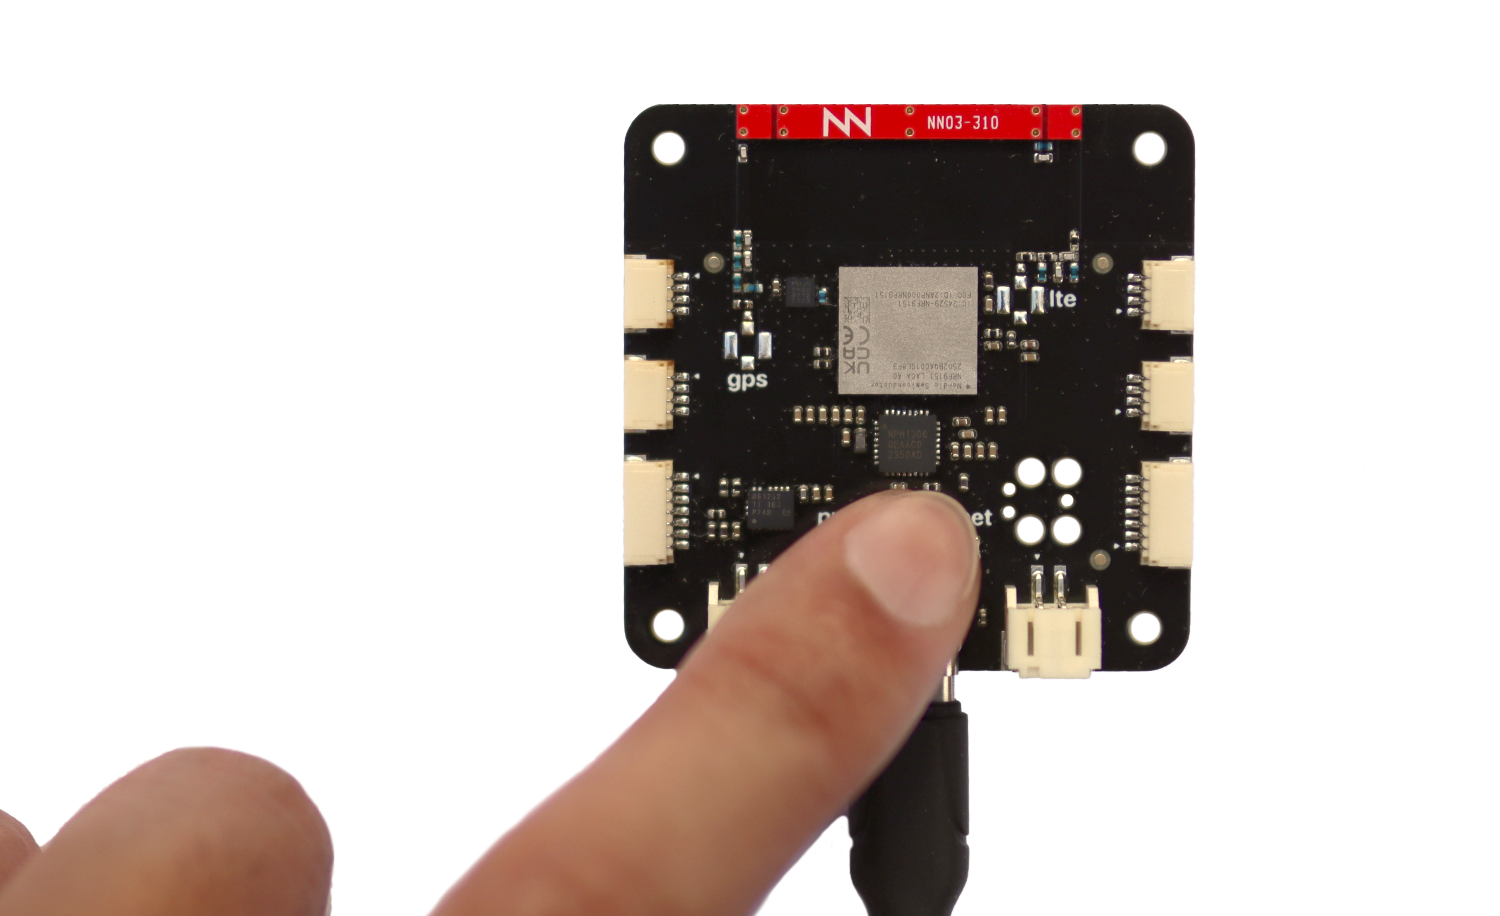
Superstack will then prompt you to press the button to complete pairing. Click the button on the S2 Module to connect:
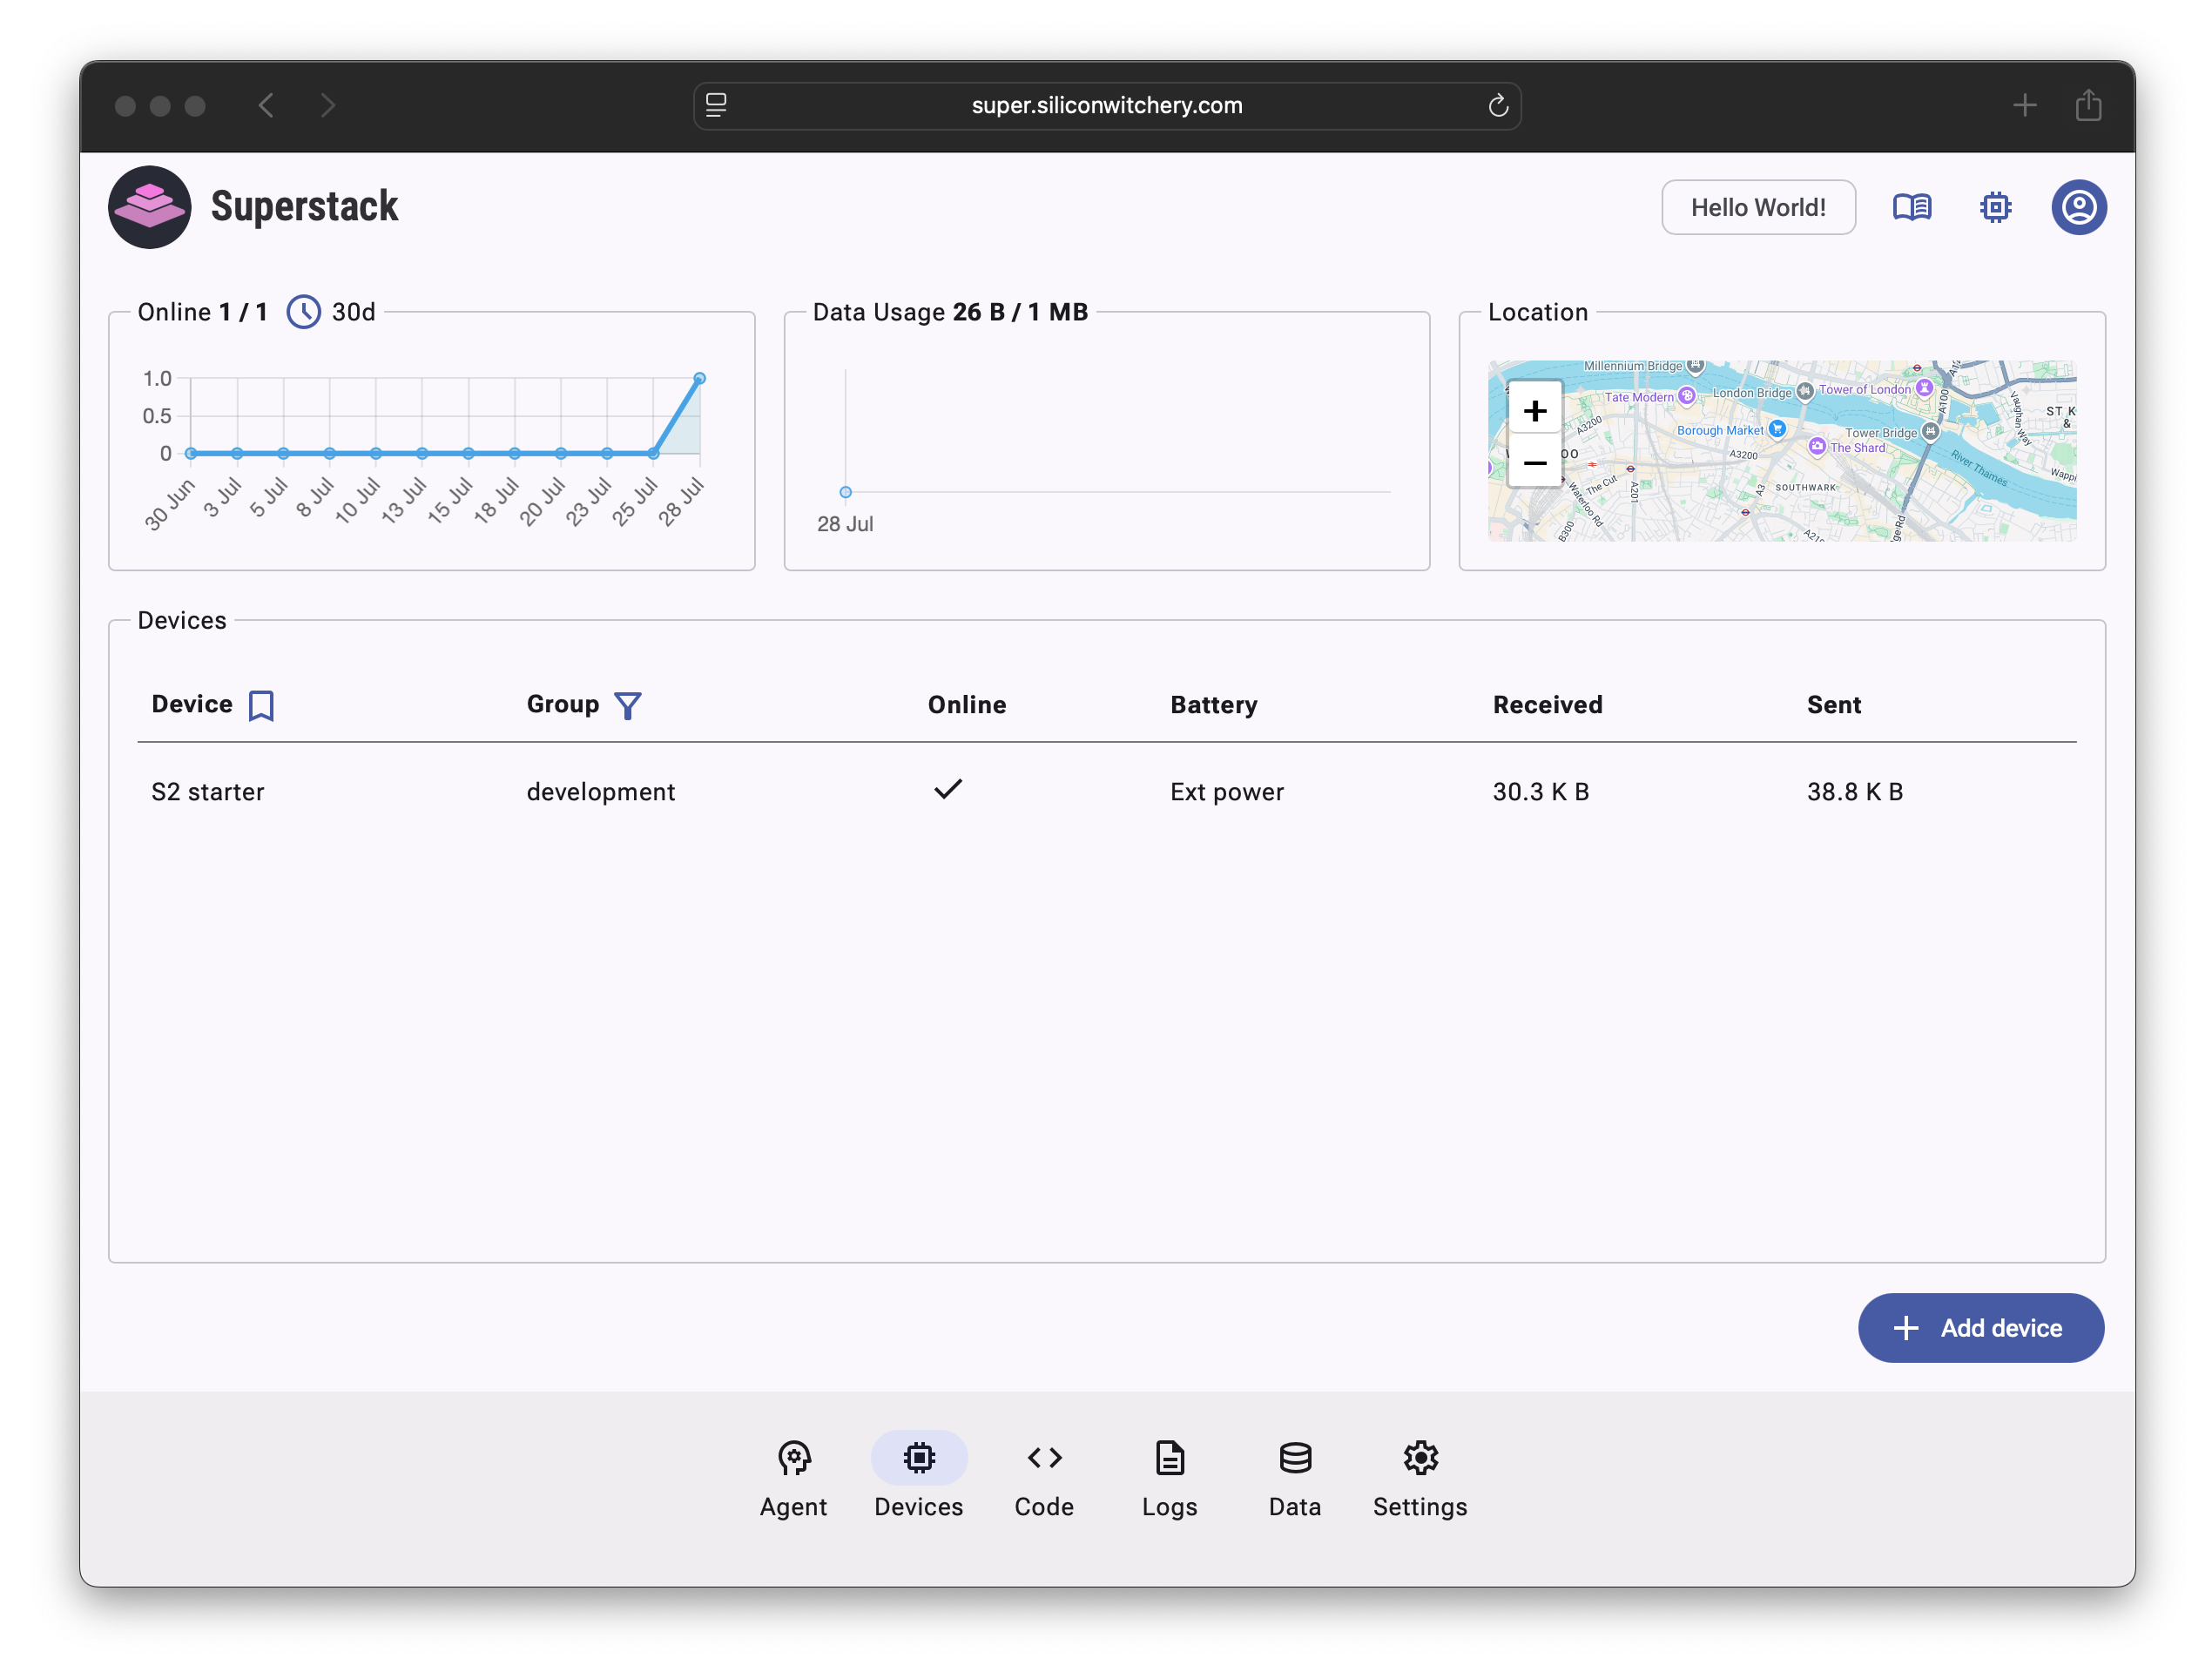
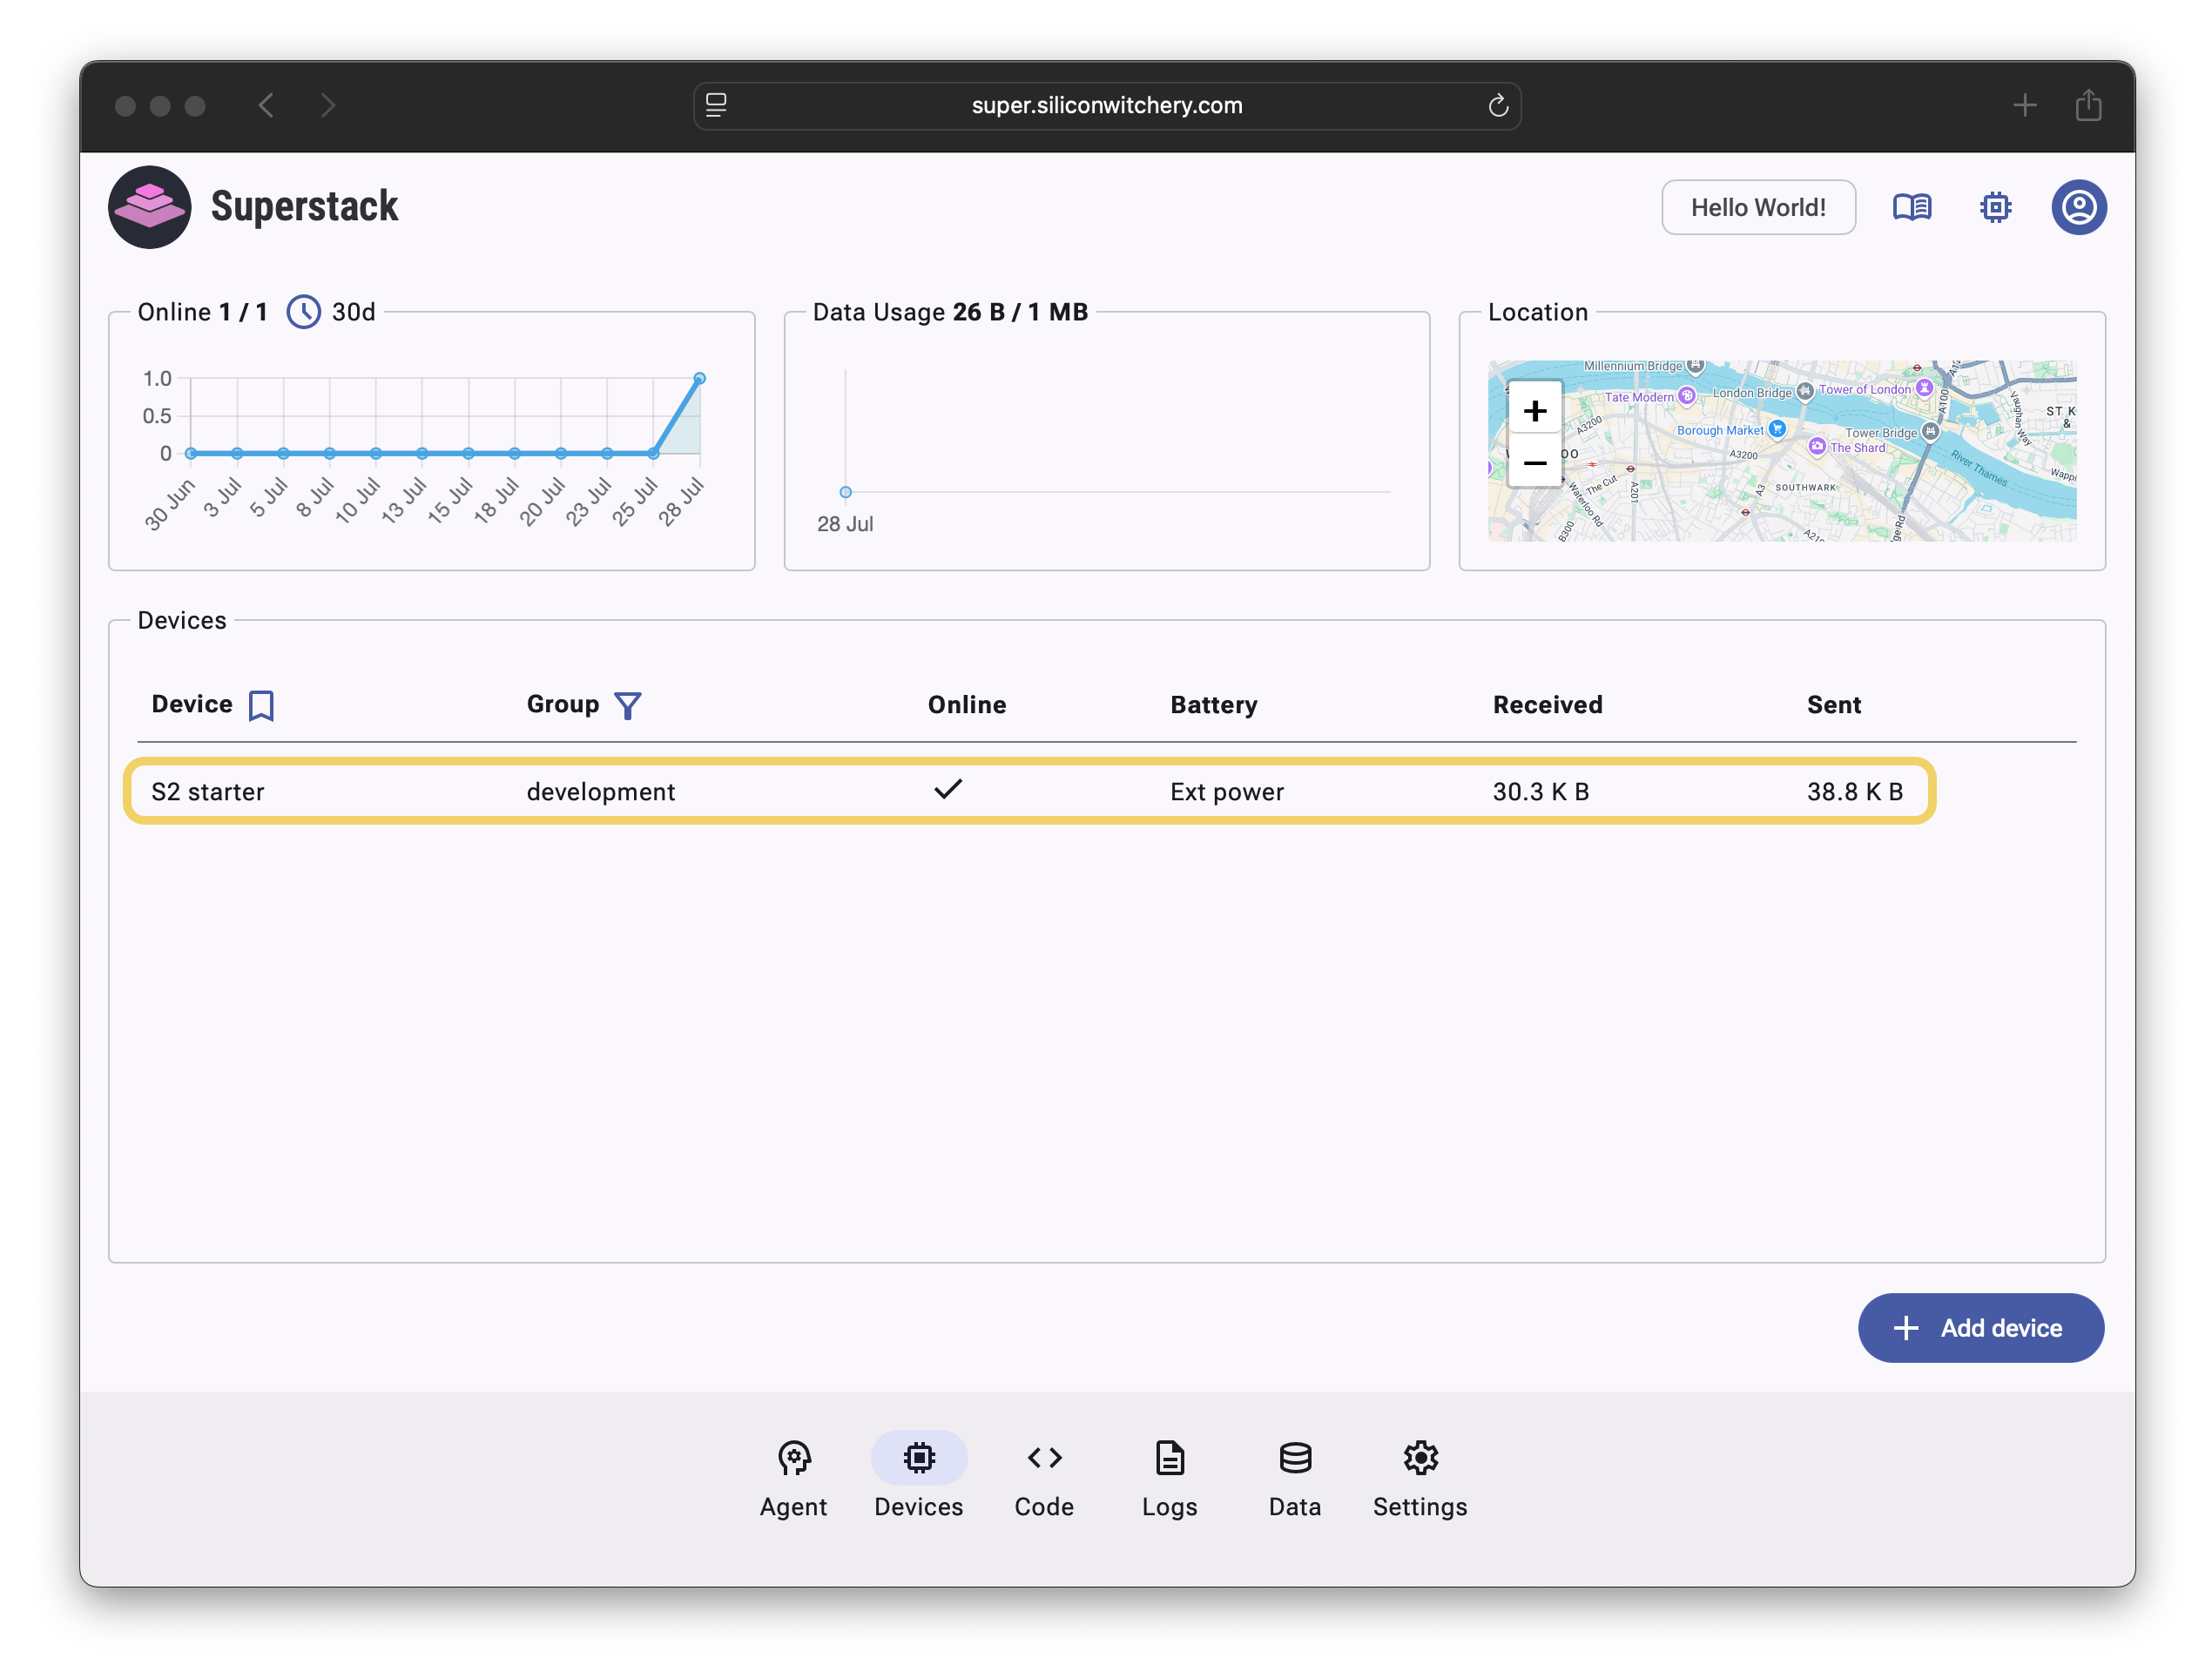
The paired module will then be shown in the Devices tab:
Step 5: Edit the Code
Navigate to the Code tab to access the code editor.
The S2 Module runs Lua and is easily reprogrammable with a single click while the device has cellular connection. If the device loses connection or is powered off, it will automatically download the latest code on re-connection and run it right away.
Lua is a small, efficient, and stable scripting language that has been around for over 30 years. It runs incredibly well on the modern ARM Cortex-M33 processor of the S2 Module, and allows for a workflow where changing and running code takes a matter of seconds. No compilation or programming tools are required.
See the full API reference for details around programming the hardware features of the S2 Module.
Paste the following code and click the Save icon:
print("My first S2 Lua app")

while true do
    print("Generating a random number between 40 and 60")
    local r = math.random(40, 60)

    print("Sending data to Superstack")
    network.send_data{ number=r }

    print("Sleeping")
    device.sleep(60)
end

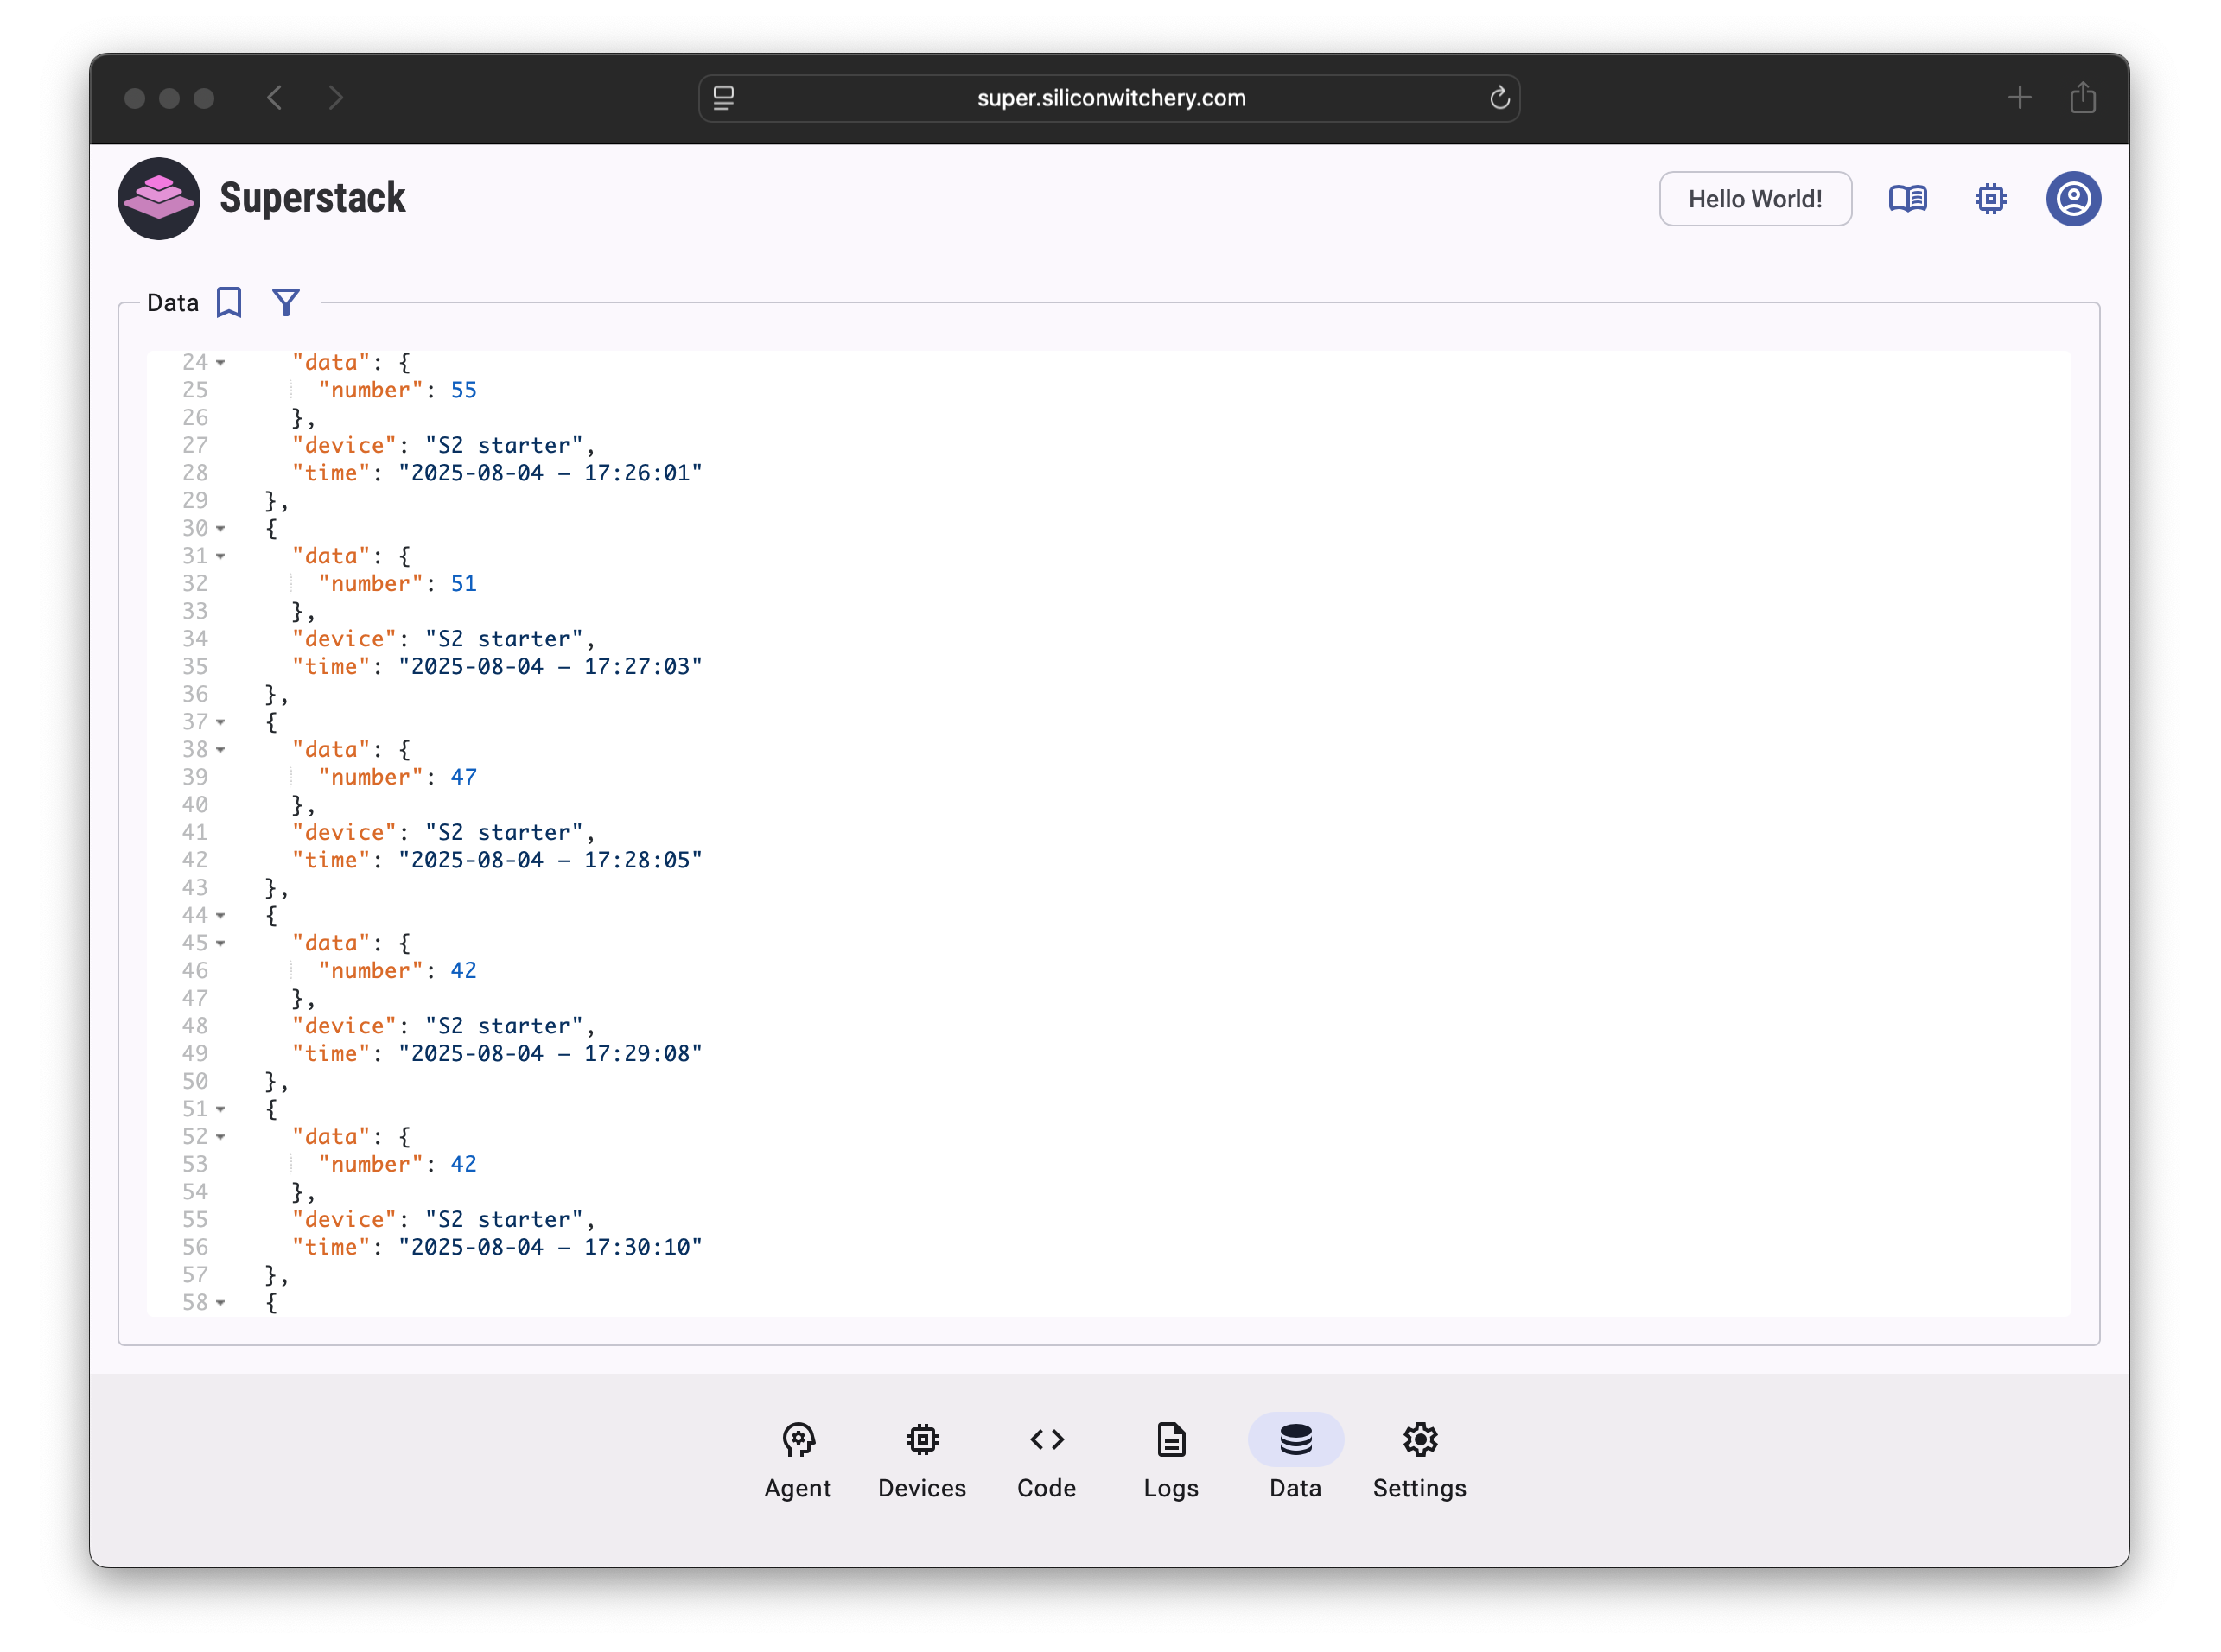
This code generates a random number between 40 and 60 every minute and sends the value to Superstack. Anything logged with print() statements will be visible at the bottom of the page (as well as from the Logs tab), and data will be shown on the Data tab:
Step 6: Analyze data using the AI Agent
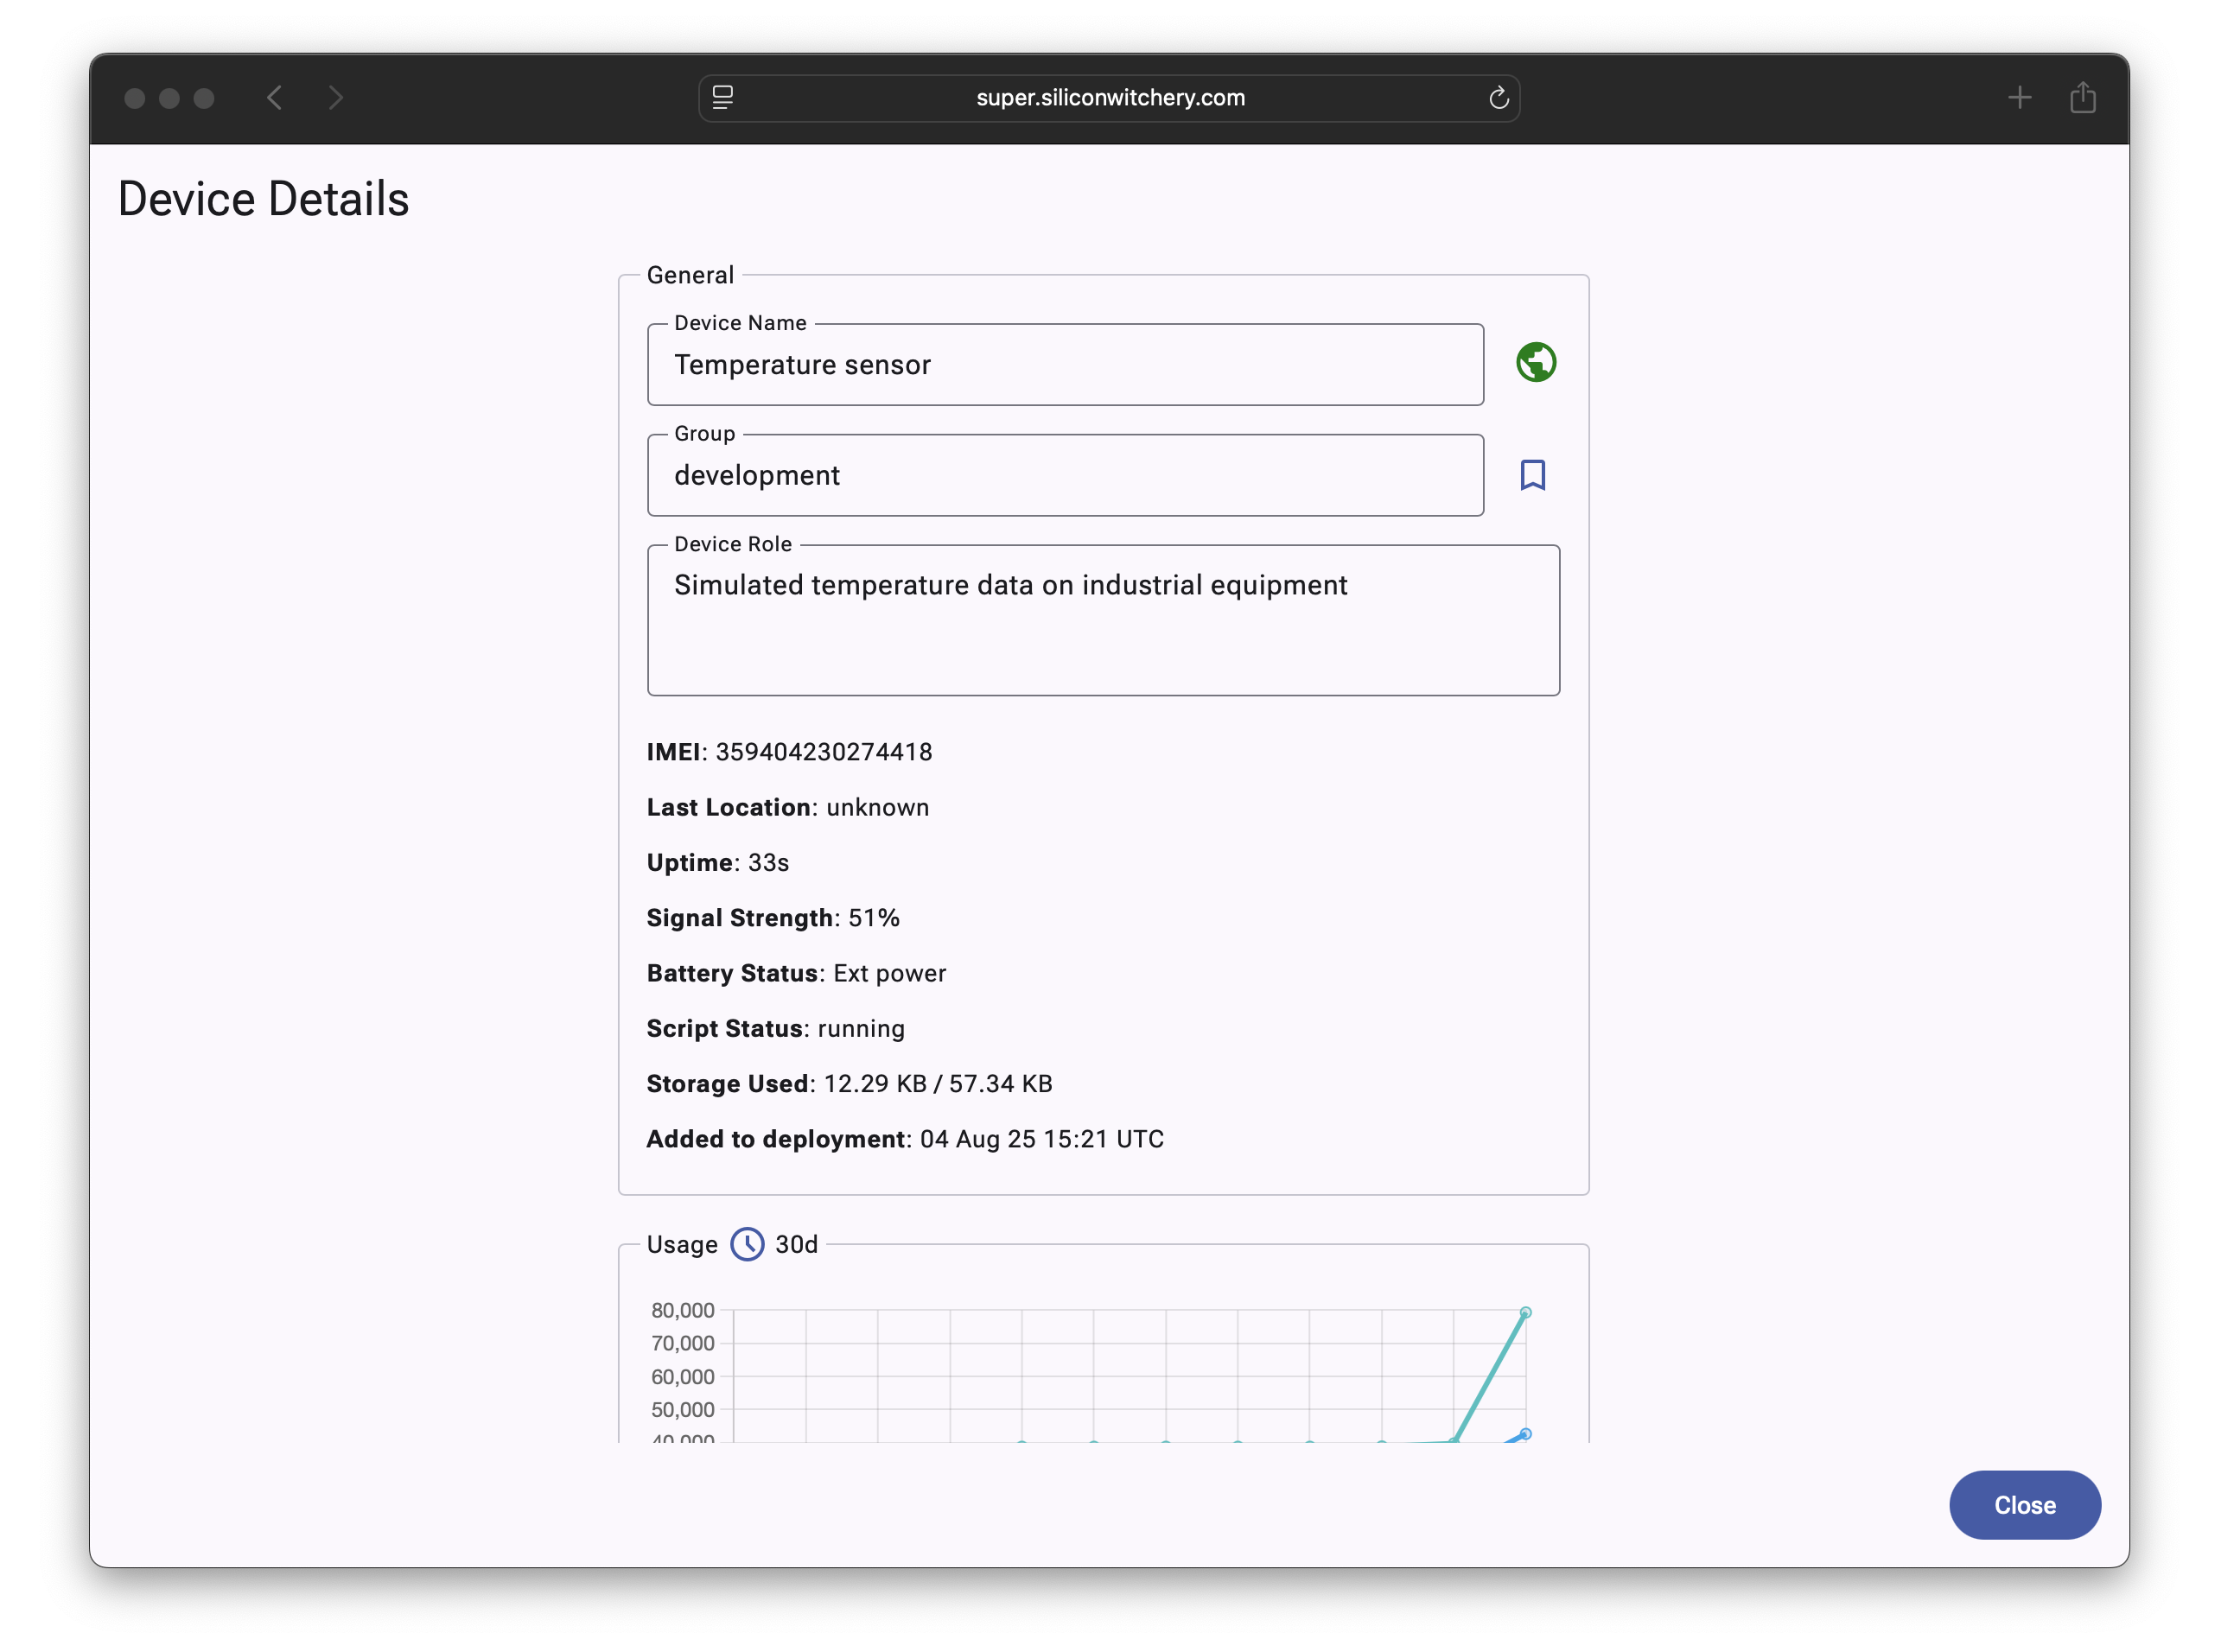
Superstack includes an advanced AI data agent that can perform deep analysis on aggregated sensor data. Navigate to the Devices tab and click on the device we just added:
Edit the Device Role to give the AI agent better context of what the device is intending to monitor or process:
For best results, provide as much detail as possible. Include details about what the device is monitoring, what to look out for as well as the units and range of measurement. Avoid excessive use of acronyms or irrelevant technical details to avoid the model getting confused.
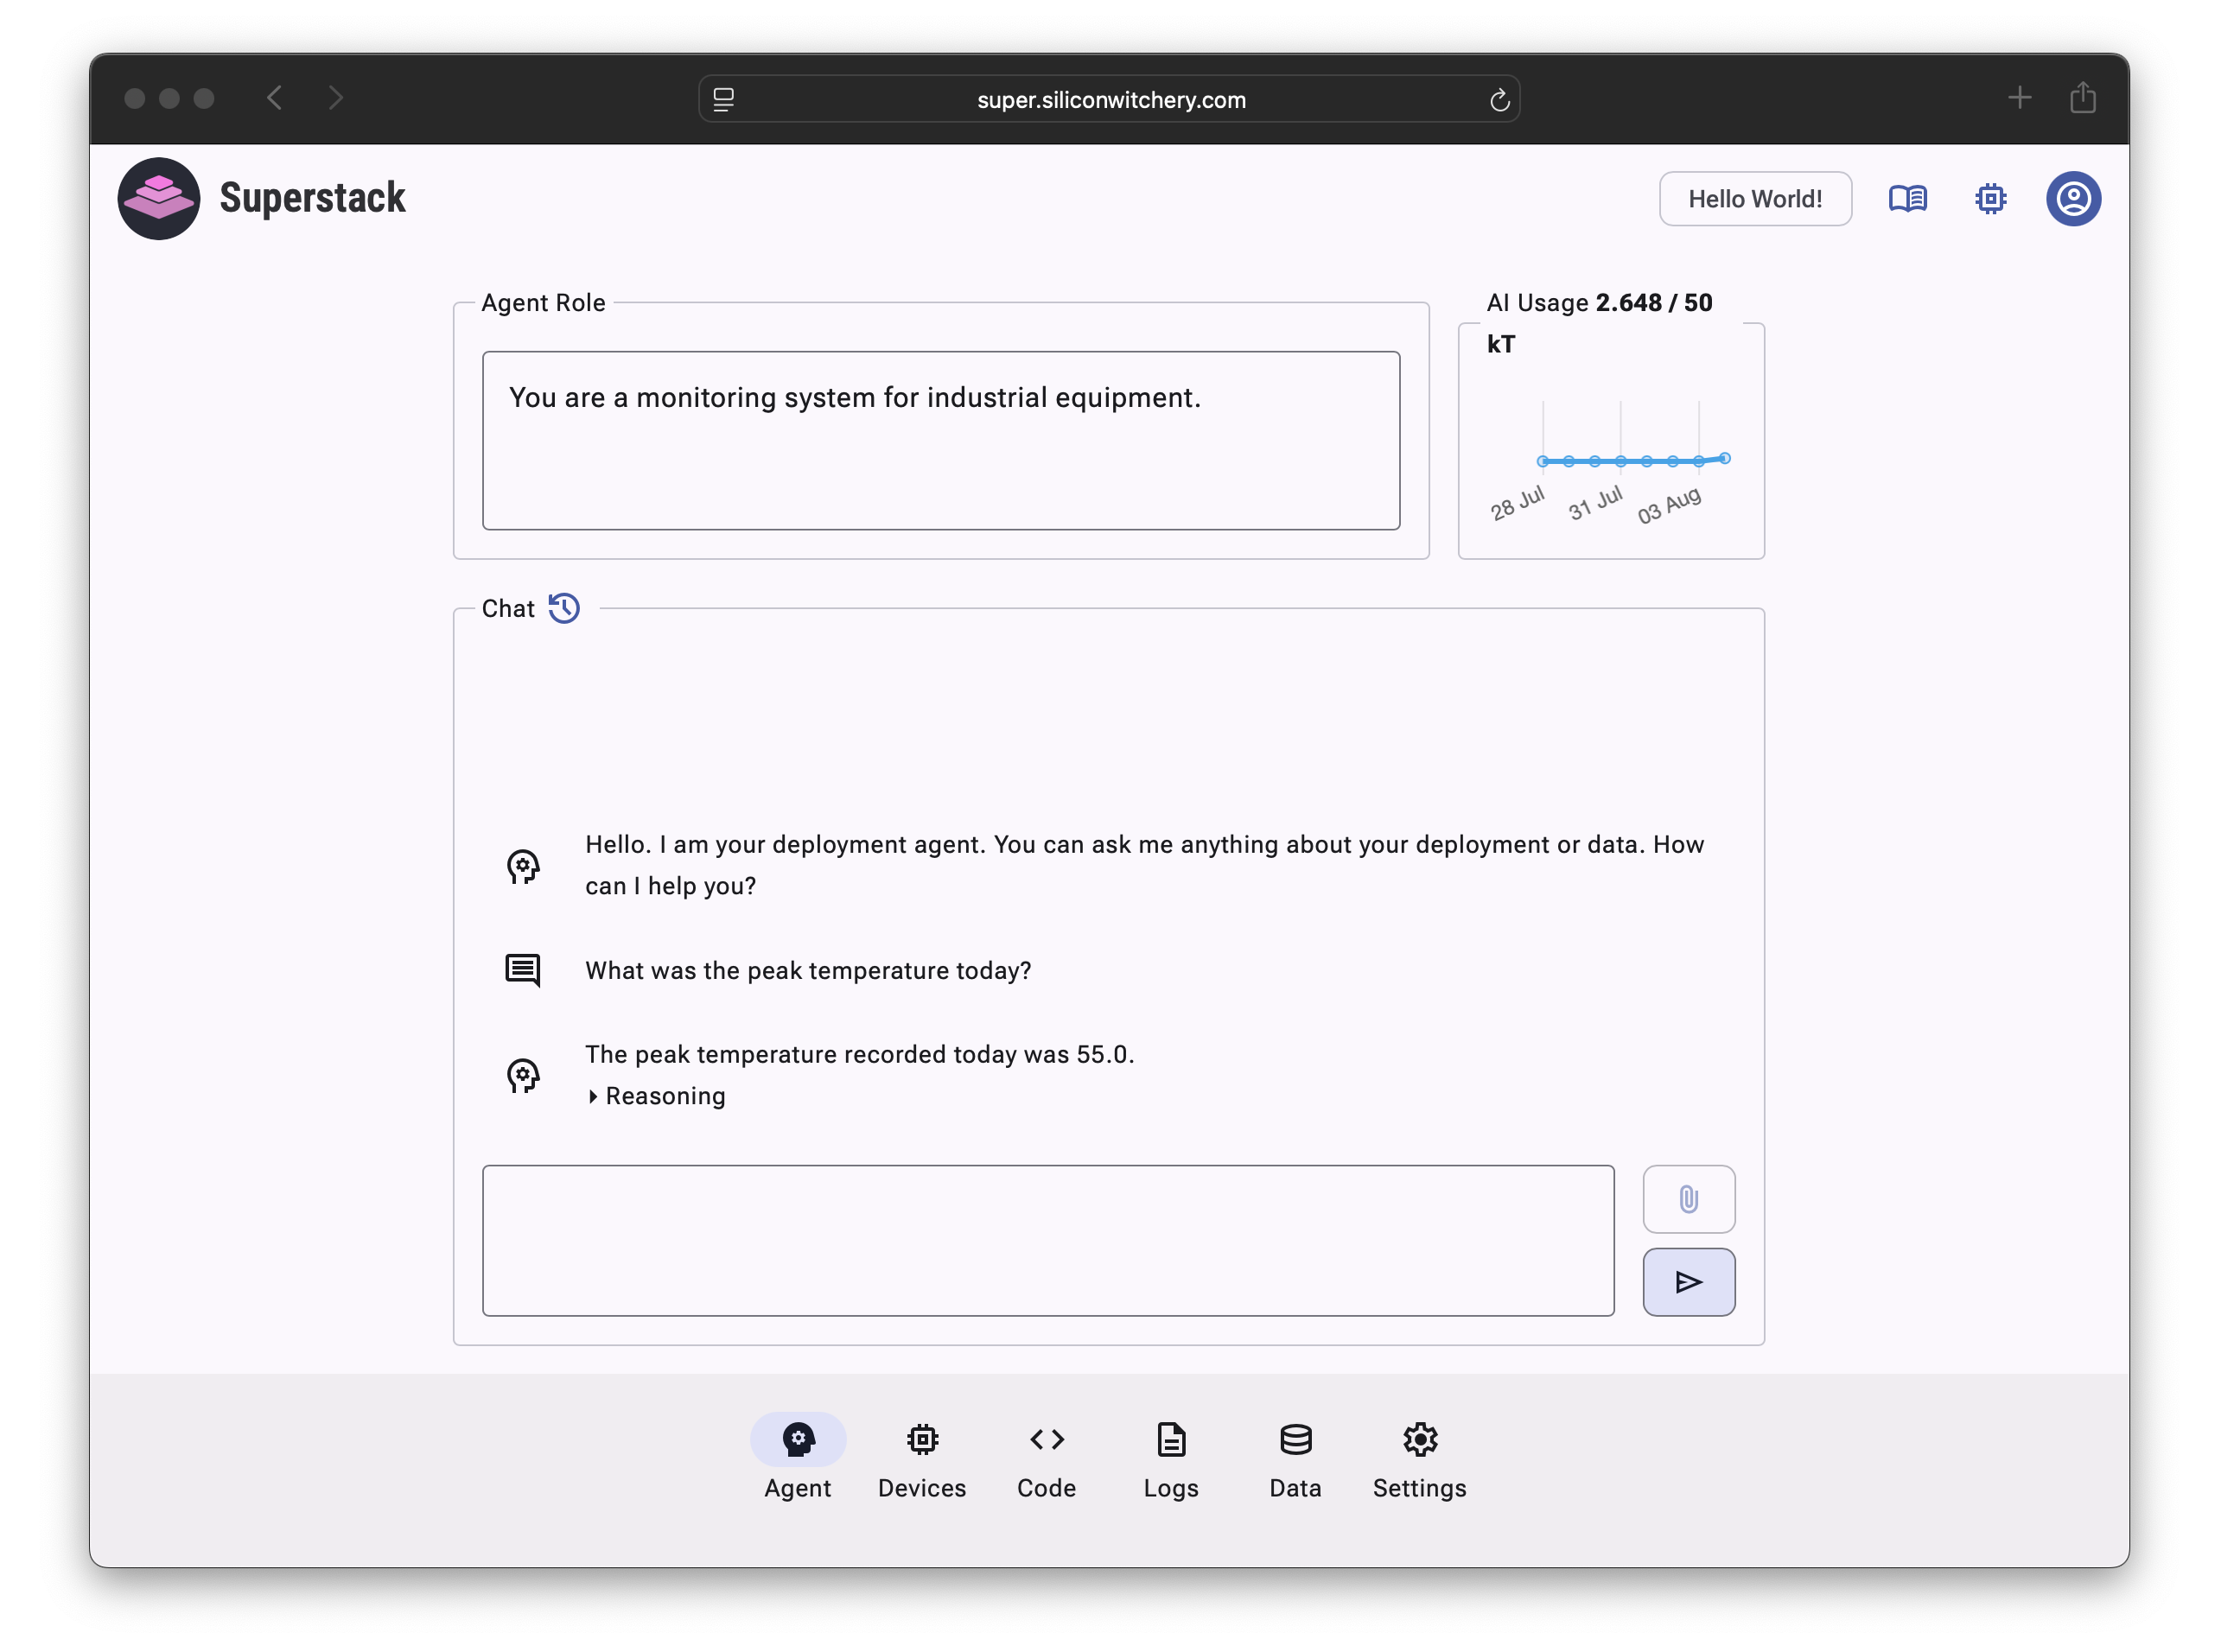
Next, navigate to the Agent tab and edit the Agent Role to tell the agent about the intentions of the overall deployment.
While the Device Role focuses on per-device details, the Agent Role focuses on the role of the overall deployment. Here you can additionally give the agent broader domain specific context, as well as tailor the personality to answer queries in a way that suits your users.
Finally, ask the agent a question about your data:
As you gather more data from multiple devices, the agent capabilities will help extract deeper insights and patterns as picked up by your sensors. To learn more about how the agent can be used with real sensors, check out our article on Easy Air Quality Monitoring.
Learn More
Need Assistance?
For support or questions, email our engineering team for a free consultation.